How to Make Ramen at Home: 3 Levels, From Instant Noodles to Restaurant-Quality
One bowl, three levels. Start with a packet of instant noodles, learn how to build a proper chicken broth, then go all in with slow-braised pork, marinated eggs and the pantry ingredients that make great ramen.
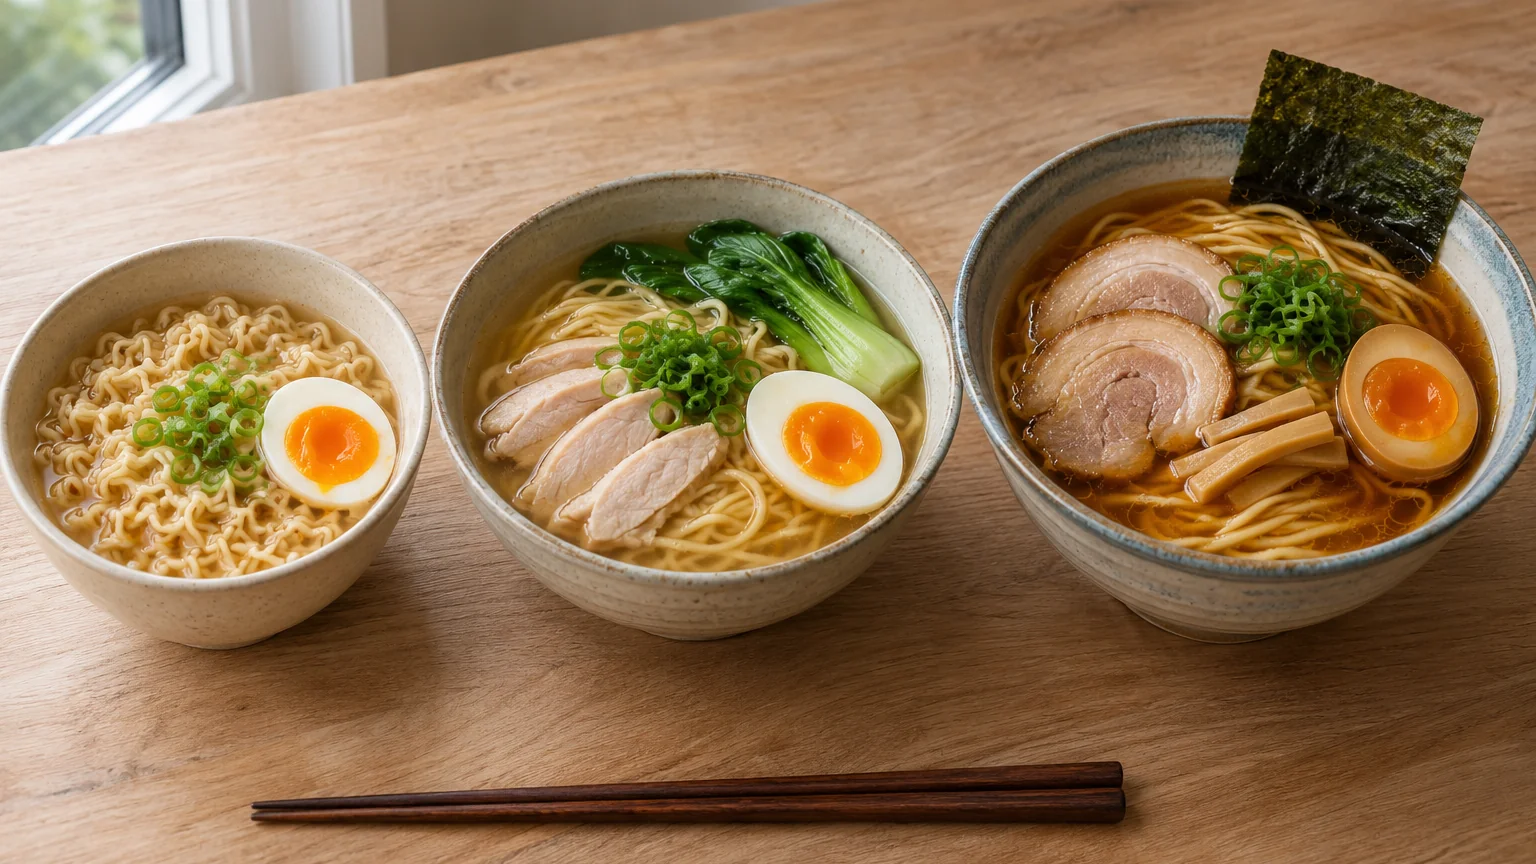
One bowl, three levels. Start with a packet of instant noodles, learn how to build a proper chicken broth, then go all in with slow-braised pork, marinated eggs and the pantry ingredients that make great ramen.
There’s something about a really good bowl of ramen.
The noodles have just the right bite. The broth is rich without being heavy. The meat is tender, the egg has a deep orange yolk, and there’s a little slick of fragrant oil floating across the surface.
Every mouthful seems to have something going on.
Then there’s the ramen most of us make at home: a packet of instant noodles, boiling water and a seasoning sachet.
And you know what? There’s absolutely nothing wrong with that.
Instant ramen is brilliant. It’s cheap, convenient and deeply satisfying, especially when you’re hungry and don’t particularly feel like cooking.
But there’s a whole world between instant noodles and the sort of ramen you might queue for at a good Japanese restaurant.
And the really interesting thing is that you can get there one step at a time.
We’re going to make three versions of ramen, each building on the last.
Level 1 starts with instant noodles and a handful of ingredients that make them taste much better.
Level 2 replaces the shortcut broth with a proper homemade chicken broth, adds fresh ramen noodles and introduces the technique of building your own seasoning.
Level 3 takes everything further: a more complex broth, slow-braised chashu pork, soy-marinated eggs, fragrant oil and the classic finishing touches.
By the end, you’ll understand not just how to make ramen, but why a great bowl tastes so good.
Choose your level
| What you’re making | Time | Difficulty | |
|---|---|---|---|
| Level 1 | Upgraded Instant Ramen | 15 minutes | Beginner |
| Level 2 | Homemade Chicken Shoyu Ramen | 60–75 minutes | Intermediate |
| Level 3 | Ultimate Ramen-Shop Shoyu Ramen | Weekend project | Advanced |
Level 1 is your quick lunch.
Level 2 is the bowl you’ll want to make for dinner.
Level 3 is for a weekend when you’re happy to spend some time cooking, because the result is worth it.
First, Understand the Five Parts of Ramen
A great bowl of ramen isn’t just noodles floating in soup.

It’s a combination of components, each doing a different job.
Once you understand these five elements, ramen becomes surprisingly logical.
1. Broth: The body of the bowl
Broth is the liquid foundation of ramen.
Depending on the style, it might be made with chicken, pork bones, seafood, vegetables or a combination.
Some ramen broths are clear and delicate. Others are cloudy, thick and rich.
For our three levels, we’re working towards a clear, savoury chicken-based broth.
At Level 1, we’ll use the liquid from our upgraded instant noodles.
At Level 2, we’ll make chicken broth from scratch.
At Level 3, we’ll build on that chicken broth with Japanese dashi, adding another layer of depth.
One important thing to understand is that ramen broth doesn’t necessarily contain all the seasoning.
That comes next.
2. Tare: Where the seasoning lives
Tare, pronounced roughly “ta-reh”, is a concentrated seasoning mixture.
It’s one of the things that distinguishes carefully constructed ramen from an ordinary noodle soup.
A ramen restaurant might prepare a large pot of relatively lightly seasoned broth, then use different tare mixtures to create different styles.
Shoyu tare is based on soy sauce.
Shio tare is salt-based.
Miso tare uses fermented soybean paste.
Rather than seasoning the entire stockpot, the tare is often added directly to each serving bowl.
This makes it easier to control the flavour and saltiness.
We’re going to build a simple shoyu tare at Level 2, then improve it further at Level 3.
3. Aroma oil: The flavour you smell
Ever noticed the little droplets of oil floating on top of restaurant ramen?
They’re not necessarily just grease.
Aromatic oils can carry the fragrance of garlic, spring onion, chilli, sesame or chicken fat.
That aroma is part of what makes the bowl satisfying.
At Level 1, we’ll use a little toasted sesame oil.
At Level 2, we’ll keep things simple with a modest amount of fragrant oil.
At Level 3, we’ll prepare a proper spring onion and garlic oil.
4. Noodles: More than just a vehicle for soup
Traditional ramen noodles are made with wheat flour and alkaline salts, commonly called kansui.
These give the noodles their distinctive springy texture and, often, yellow colour.
Instant ramen noodles are usually pre-cooked and dehydrated.
They’re excellent for convenience, but fresh or good-quality dried ramen noodles can offer a firmer, more resilient bite.
At Level 2, we’ll make that upgrade.
One important rule: Cook the noodles separately from the finished broth whenever practical.
It helps prevent excess starch from making your carefully prepared soup cloudy or thick.
5. Toppings: Contrast and texture
Toppings are where a bowl becomes personal.
A soft-boiled egg adds richness.
Tender pork brings flavour and substance.
Spring onion adds freshness.
Nori introduces a subtle marine savouriness.
Bamboo shoots bring a slightly crunchy texture.
But more isn’t automatically better.
A great bowl of ramen doesn’t need ten toppings.
It needs a few carefully chosen ingredients that complement the broth and noodles.
Level 1: The Instant Ramen Upgrade
A packet of noodles, made properly delicious
We’re starting with something familiar.
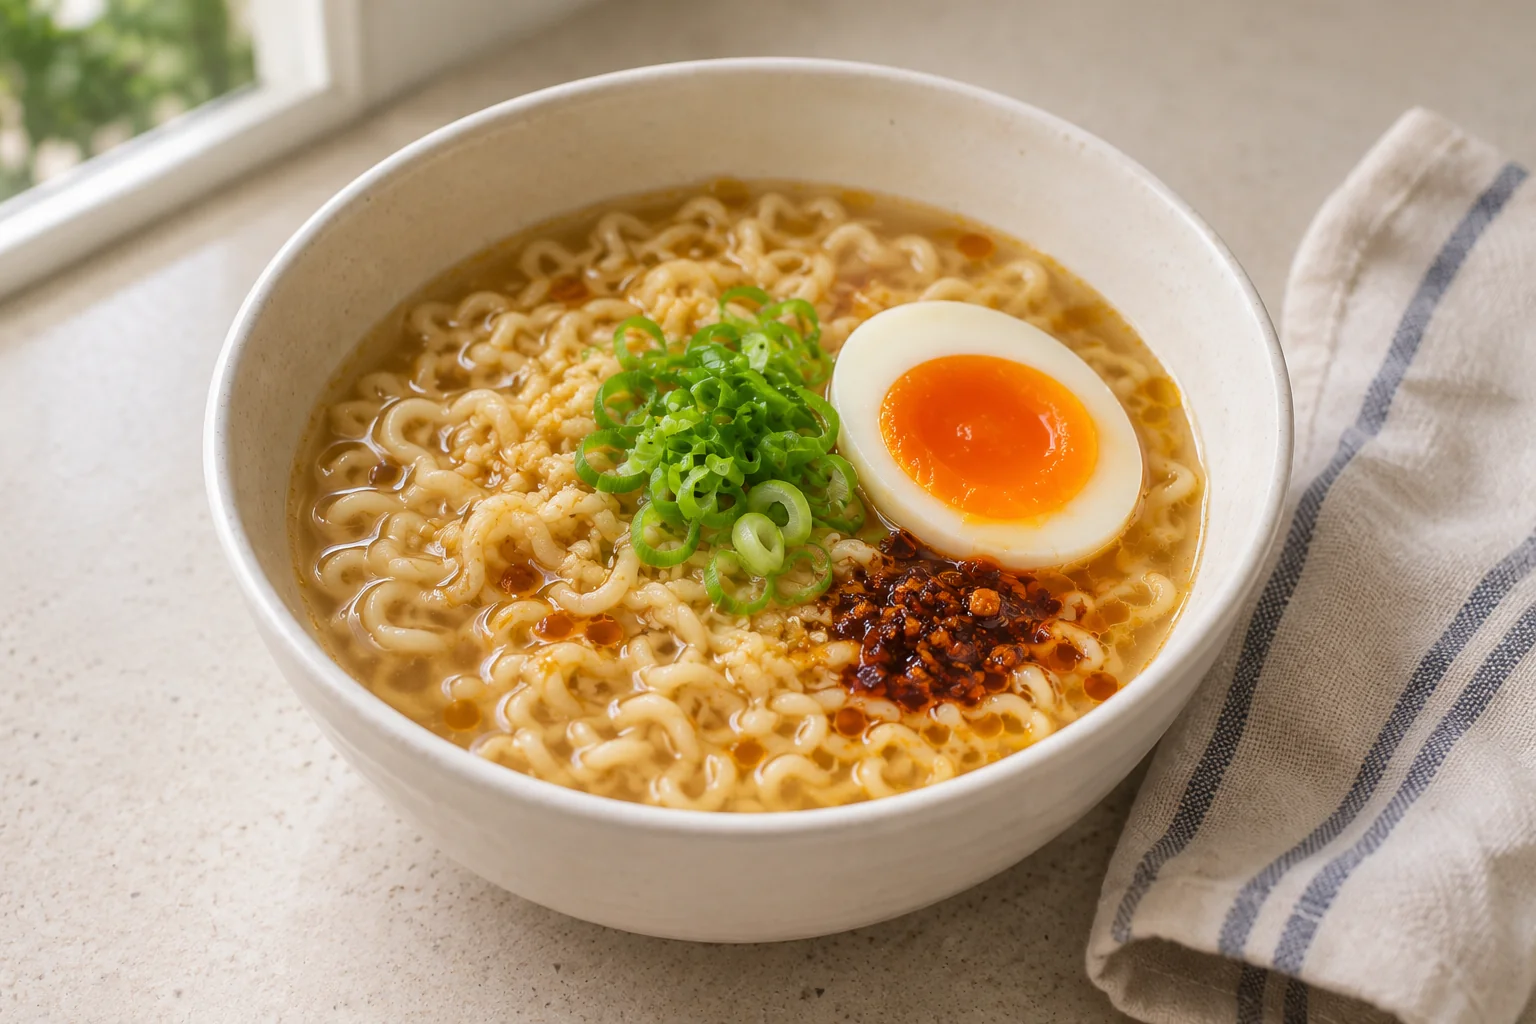
A packet of instant ramen.
No complicated stock-making. No braising meat. No special trip to the Asian supermarket.
The aim is simple: make your everyday instant ramen taste noticeably better using ingredients that are useful to have in the pantry.
We’re keeping the instant noodles and a little of the seasoning sachet.
But we’re adding fresh garlic, ginger, soy sauce, toasted sesame oil, an egg and spring onion.
These small additions make a surprisingly big difference.
Level 1 recipe card
Upgraded Instant Ramen
- Serves
- 2
- Prep
- 5 minutes
- Cook
- 10 minutes
- Total
- 15 minutes
- Difficulty
- Beginner
Spoon measures: 15 mL tablespoon, 5 mL teaspoon.
Ingredients
- 2 packets instant ramen noodles, preferably chicken or soy flavour
- Approximately ½ of each included seasoning sachet, to start
- 800mL water
- 1 garlic clove, finely grated
- 1 teaspoon fresh ginger, finely grated
- 1–2 teaspoons Japanese-style soy sauce, to taste
- 1 teaspoon toasted sesame oil
- 2 eggs
- 2 spring onions, thinly sliced
Optional
- A little chilli crisp
- A pinch of white pepper
- A few drops of chilli oil
Method
- Start with the eggs. Bring a saucepan of water to the boil. Carefully lower in the eggs. Cook for approximately 6½–7 minutes for a jammy yolk, depending on egg size and temperature. Transfer immediately to cold or iced water to stop the cooking. If you’re cooking for someone who needs fully cooked eggs, cook until the yolks are firm.
- Prepare the broth. In a separate saucepan, bring 800mL water to a gentle simmer. Add the garlic and ginger. Simmer for approximately 3–4 minutes to release their flavours.
- Add the seasoning. Start by adding half of each instant noodle seasoning sachet. Stir, then taste. Add a little soy sauce if you want more savoury depth. You may not need the full amount of soy sauce, depending on the noodle brand. The idea is to improve the flavour without making it unnecessarily salty.
- Cook the noodles. Cook the noodles according to their packet instructions, preferably in a separate saucepan of boiling water. Drain well.
- Assemble. Divide the noodles between two bowls. Pour over the hot broth. Add a little toasted sesame oil to each bowl.
- Finish. Peel and halve the eggs. Add one egg to each bowl, then scatter over the spring onions. Finish with chilli crisp or chilli oil if you enjoy a little heat. Serve immediately.
Why these additions work
Garlic and ginger
These bring fresh aromatic flavour that instant seasoning sachets can’t entirely replicate.
Garlic adds a savoury warmth, while ginger brings a lighter, fragrant note.
Soy sauce
A little soy sauce adds fermented depth.
However, your seasoning sachet may already contain plenty of salt and soy-derived flavour, so start carefully.
Toasted sesame oil
A few drops make the soup smell more fragrant.
It’s a small addition, but one you’ll notice immediately when you lean over the bowl.
A proper egg
A softly cooked egg turns instant noodles into something that feels much more substantial.
The rich yolk works beautifully with the savoury soup.
What have you learned?
Even simple ramen benefits from balancing savoury seasoning, fresh aromatics and a little fat.
You’ve also learned to taste the broth rather than blindly adding the entire seasoning packet.
And perhaps most importantly, you’ve made a much better lunch without spending much more time cooking.
But we’re still relying on an instant noodle packet for most of the flavour.
At Level 2, we’re going to take control of the broth ourselves.
Level 2: Homemade Chicken Shoyu Ramen
Your first proper bowl of ramen
This is where things become much more interesting.
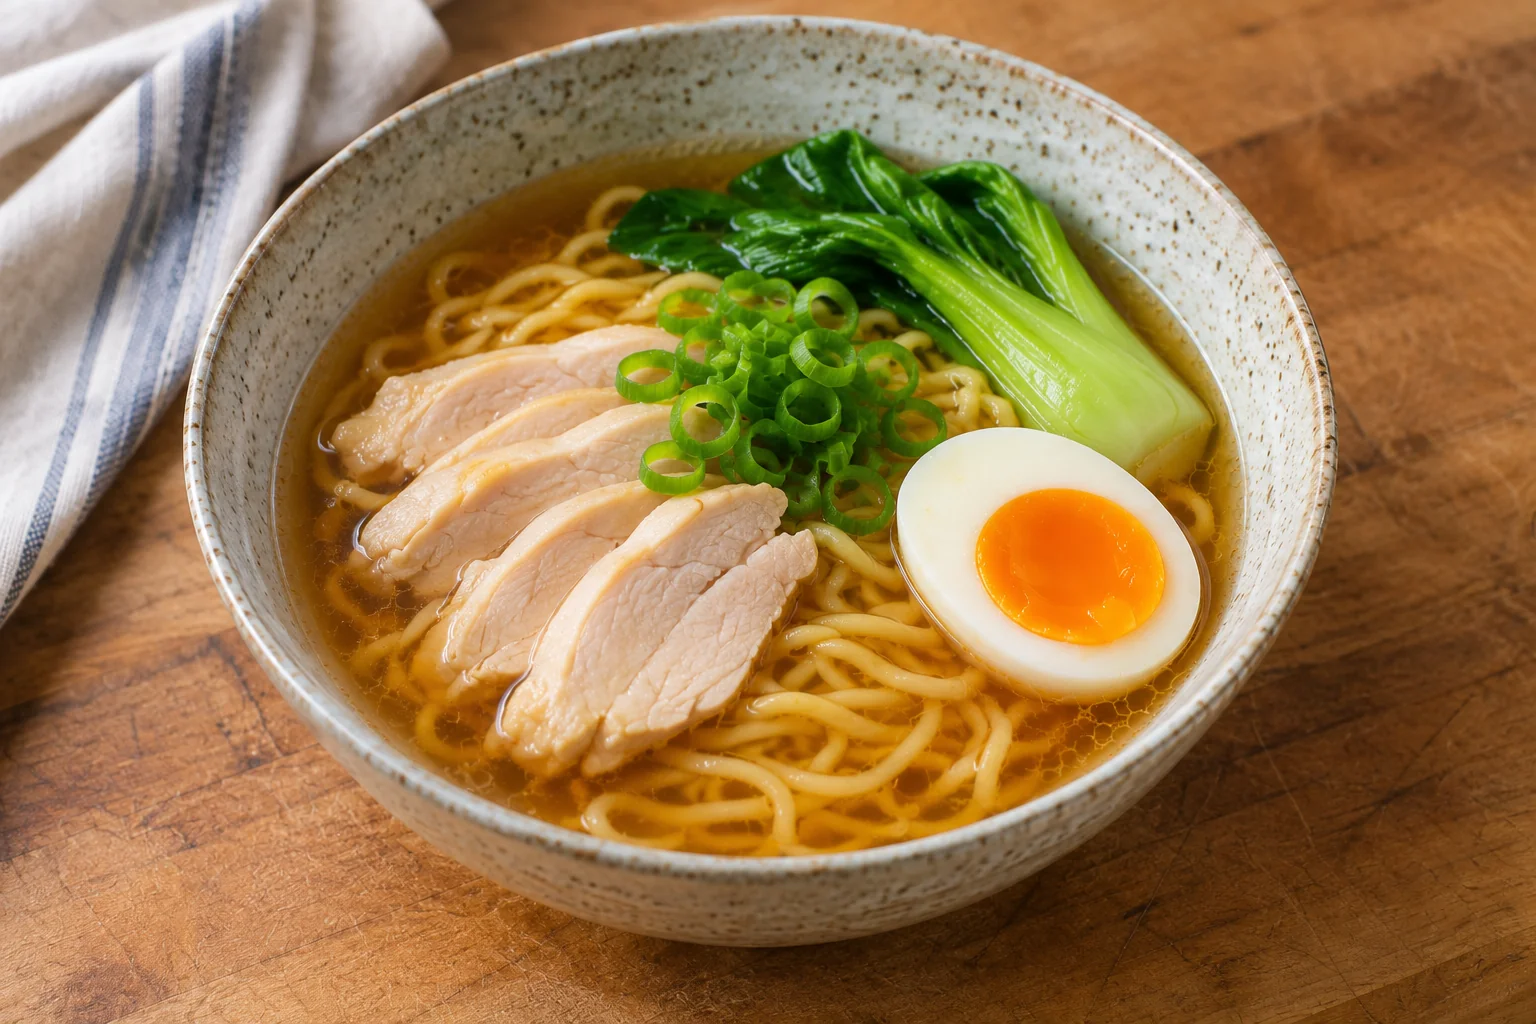
We’re replacing the instant noodle shortcut with three important upgrades.
First, we’re making our own chicken broth.
Second, we’re using fresh ramen noodles with a firmer, springier texture.
Third, we’re making a simple shoyu tare instead of relying on a seasoning sachet.
We’re also using the chicken from our broth as the main topping, so nothing goes to waste.
It’s still a practical home-cooking recipe.
You don’t need to simmer pork bones for twelve hours or buy specialist restaurant equipment.
But the result should feel much closer to a proper bowl of Japanese ramen.
Level 2 recipe card
Homemade Chicken Shoyu Ramen
- Serves
- 2 generously
- Prep
- 15 minutes
- Cook
- Approximately 60 minutes
- Total
- 60–75 minutes
- Difficulty
- Intermediate
Spoon measures: 15 mL tablespoon, 5 mL teaspoon.
Ingredients
For the chicken broth
- 500g boneless chicken thighs
- 1.4 litres cold water
- 4cm piece fresh ginger, sliced
- 3 garlic cloves, lightly crushed
- 3 spring onions, white parts roughly chopped
- ½ brown onion
- 1 small piece kombu, approximately 5g (optional at this level)
For the shoyu tare
- 2 tablespoons Japanese-style soy sauce (30mL)
- 2 teaspoons mirin (10mL)
- 1 teaspoon sake, optional
- ¼ teaspoon sugar
For the noodles and toppings
- 2 portions fresh ramen noodles, approximately 120–150g each
- The cooked chicken from the broth, sliced
- 2 eggs
- 2 spring onions, green parts thinly sliced
- 1 teaspoon toasted sesame oil
- A small handful blanched spinach or bok choy, optional
Method
- Prepare the chicken broth. Place the chicken thighs in a saucepan with the cold water, ginger, garlic, spring onion whites and onion. Bring slowly towards a simmer. As the liquid heats, skim away any foam that rises to the surface. Lower the heat and maintain a gentle simmer. Avoid vigorous boiling, which can cloud the broth and make it harder to control the cooking.
- Cook the chicken. Simmer the chicken gently until cooked through, checking that the thickest part reaches at least 75°C. This will generally take considerably less time than the full broth simmer. Remove the chicken once cooked and transfer it to a clean covered container. Continue simmering the broth for approximately 40–50 minutes in total, allowing the aromatics to infuse. If you’re using kombu, remove it before the liquid reaches a vigorous boil.
- Strain the broth. Pour the broth through a fine sieve. Discard the spent aromatics. You should have a fragrant, relatively clear chicken broth. Measure the liquid. Aim for approximately 800–900mL for two generous bowls. If too much liquid has evaporated, top it up with a little boiling water.
- Make the tare. Combine the soy sauce, mirin, optional sake and sugar in a small saucepan. Warm gently until the sugar dissolves and the mixture is heated through. Don’t boil aggressively. Taste carefully, remembering that it’s concentrated and intended to season the broth.
- Cook the eggs. Boil the eggs for approximately 6½–7 minutes for a soft, jammy yolk. Transfer to iced water, then peel carefully. These are plain soft-boiled eggs at this level. We’ll make proper soy-marinated ramen eggs at Level 3.
- Prepare the chicken. Slice the cooked chicken into manageable pieces. You can briefly warm it in a little hot broth before serving. The chicken should be tender, not dry or shredded into tiny pieces.
- Cook the noodles. Bring a separate large saucepan of water to the boil. Cook the ramen noodles according to the packet instructions. Fresh ramen noodles often cook very quickly. Drain thoroughly.
- Build the bowls. Warm two large ramen bowls with hot water, then empty them. Divide the shoyu tare between the bowls. Add approximately 400mL hot chicken broth to each and stir. Taste before adding the noodles. If the broth needs more savoury seasoning, add a few drops of soy sauce. If it’s too salty, add a little more unsalted hot water.
- Add the noodles. Divide the drained noodles between the bowls. Lift them gently through the soup.
- Finish. Add the sliced chicken, halved eggs, spring onion greens and optional greens. Finish each bowl with a little toasted sesame oil. Serve immediately.
Watch
Marion Grasby makes a chicken-based shoyu ramen at home and serves it with her chashu pork belly. Watch it to see how a home cook puts a chicken shoyu bowl together, then use our recipe for the Level 2 quantities: we keep the topping to the chicken from the broth and save the chashu for Level 3.
Video: How To Make Shoyu Ramen At Home by Marion Grasby (Marion’s Kitchen). Watch on YouTube
Why this tastes better than instant ramen
You’ve made a real chicken broth
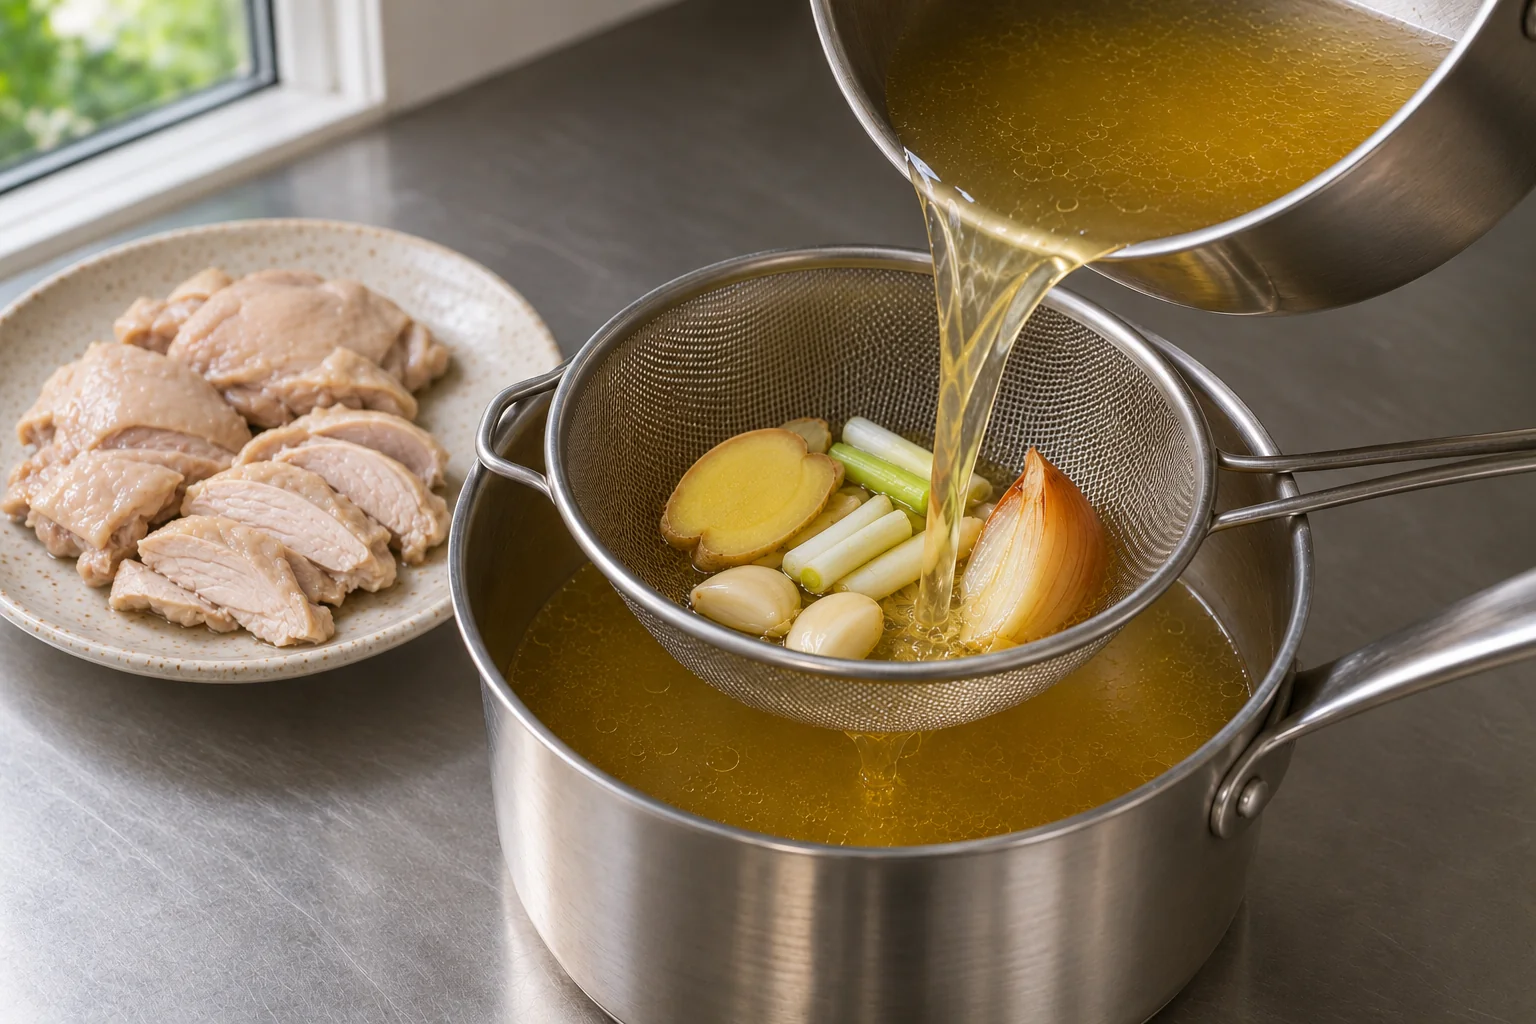
Chicken contains proteins, fat and connective tissue that contribute body and flavour as it cooks.
The ginger, garlic and spring onion add gentle aromatics.
Instead of relying on powdered seasoning alone, you’ve created a more rounded foundation.
The tare controls the seasoning
By separating the broth from the concentrated seasoning, you have much more control.
You can adjust each bowl individually.
This is also useful if you’re serving people with different preferences.
Fresh ramen noodles have a different texture
Fresh alkaline ramen noodles generally have a springier bite than ordinary instant noodles.
They also tend to hold their texture differently in hot broth.
Cook them carefully.
Overcooked noodles can spoil an otherwise excellent bowl.
The chicken becomes part of the meal
Rather than throwing away the meat used to make the broth, we’re serving it as a topping.
That’s good home cooking.
It also makes the recipe more economical.
The biggest lesson at Level 2
You’ve moved from improving a packet of noodles to understanding how ramen is constructed.
Broth gives the bowl its body.
Tare provides much of the seasoning.
Noodles contribute texture.
Toppings complete the experience.
Once you understand this structure, you can start experimenting confidently.
And that’s exactly what we’re doing next.
Level 3: The Ultimate Ramen-Shop Bowl
The weekend ramen project
Now we’re going to take the principles from Level 2 and push them further.
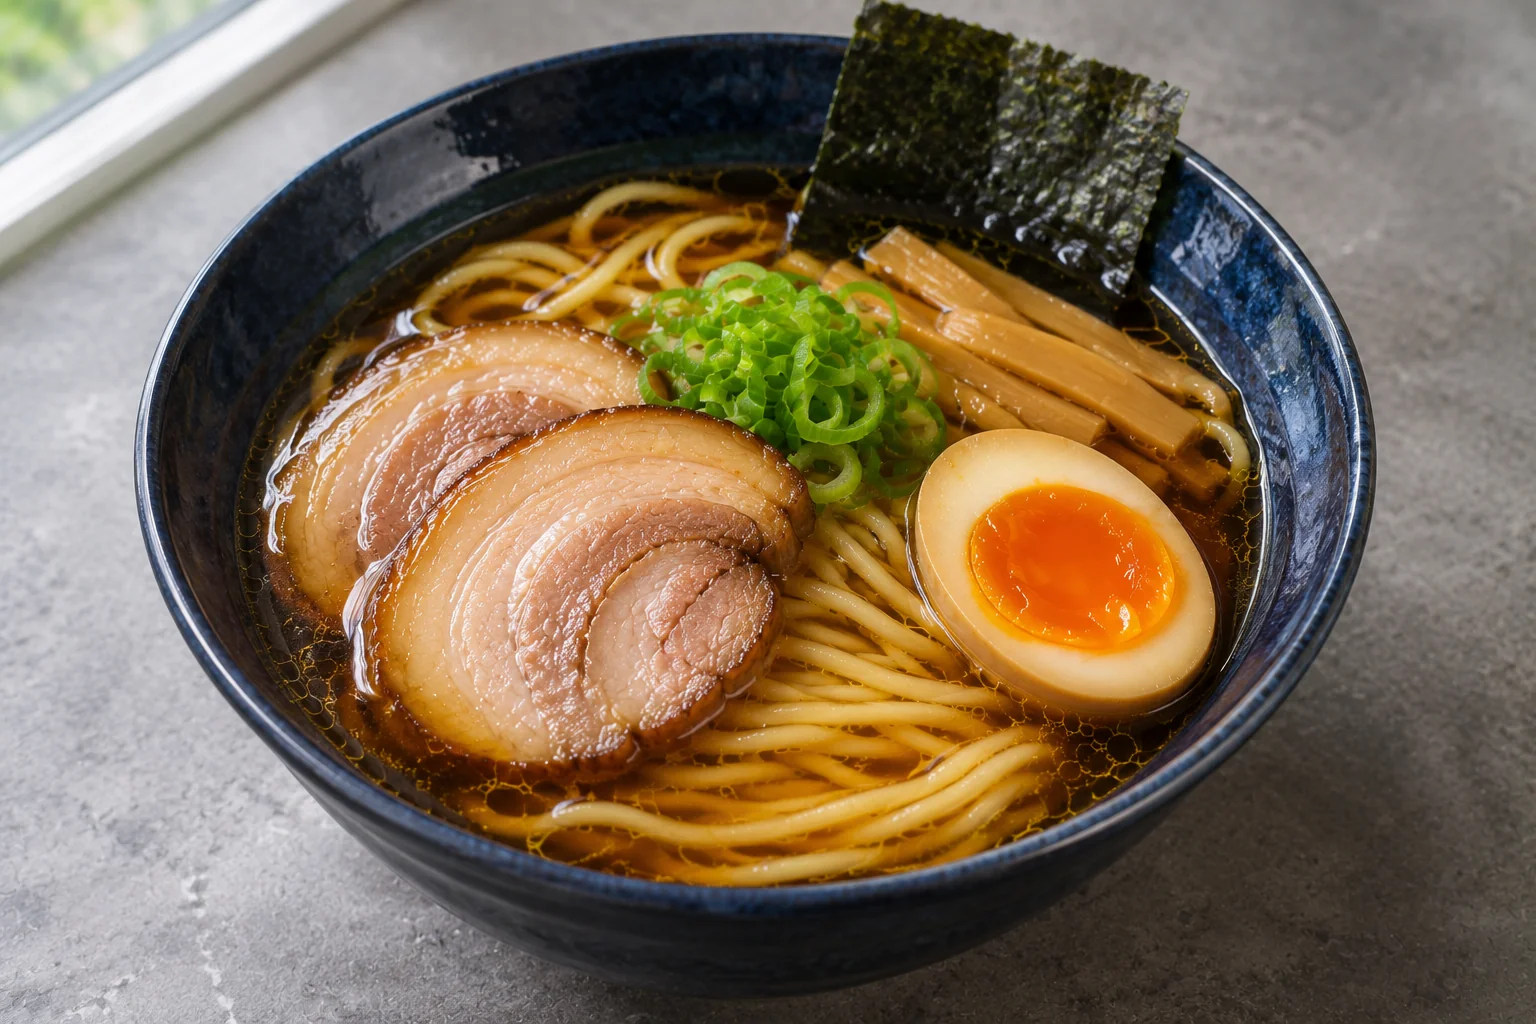
We’re still making shoyu ramen, based around a savoury chicken broth and soy-based seasoning.
But this time, we’re giving the individual components the sort of attention they’d receive in a serious ramen kitchen.
The broth becomes more complex.
The tare becomes more aromatic.
The chicken topping is replaced with properly braised chashu pork belly.
The eggs are marinated until their whites take on a savoury amber colour.
We’re making a fragrant spring onion oil.
And we’re adding a few classic finishing touches: nori, bamboo shoots and fresh spring onion.
This is the sort of project that’s best spread over two days.
Make the broth, pork and eggs ahead of time.
Then, when you’re ready to eat, assemble everything while it’s hot and fresh.
The finished bowl should feel like a significant step up from Level 2 — not because we’ve added loads of ingredients, but because we’ve taken the time to prepare them properly.
The advanced broth: Chicken meets dashi
At Level 2, we made a straightforward chicken broth.
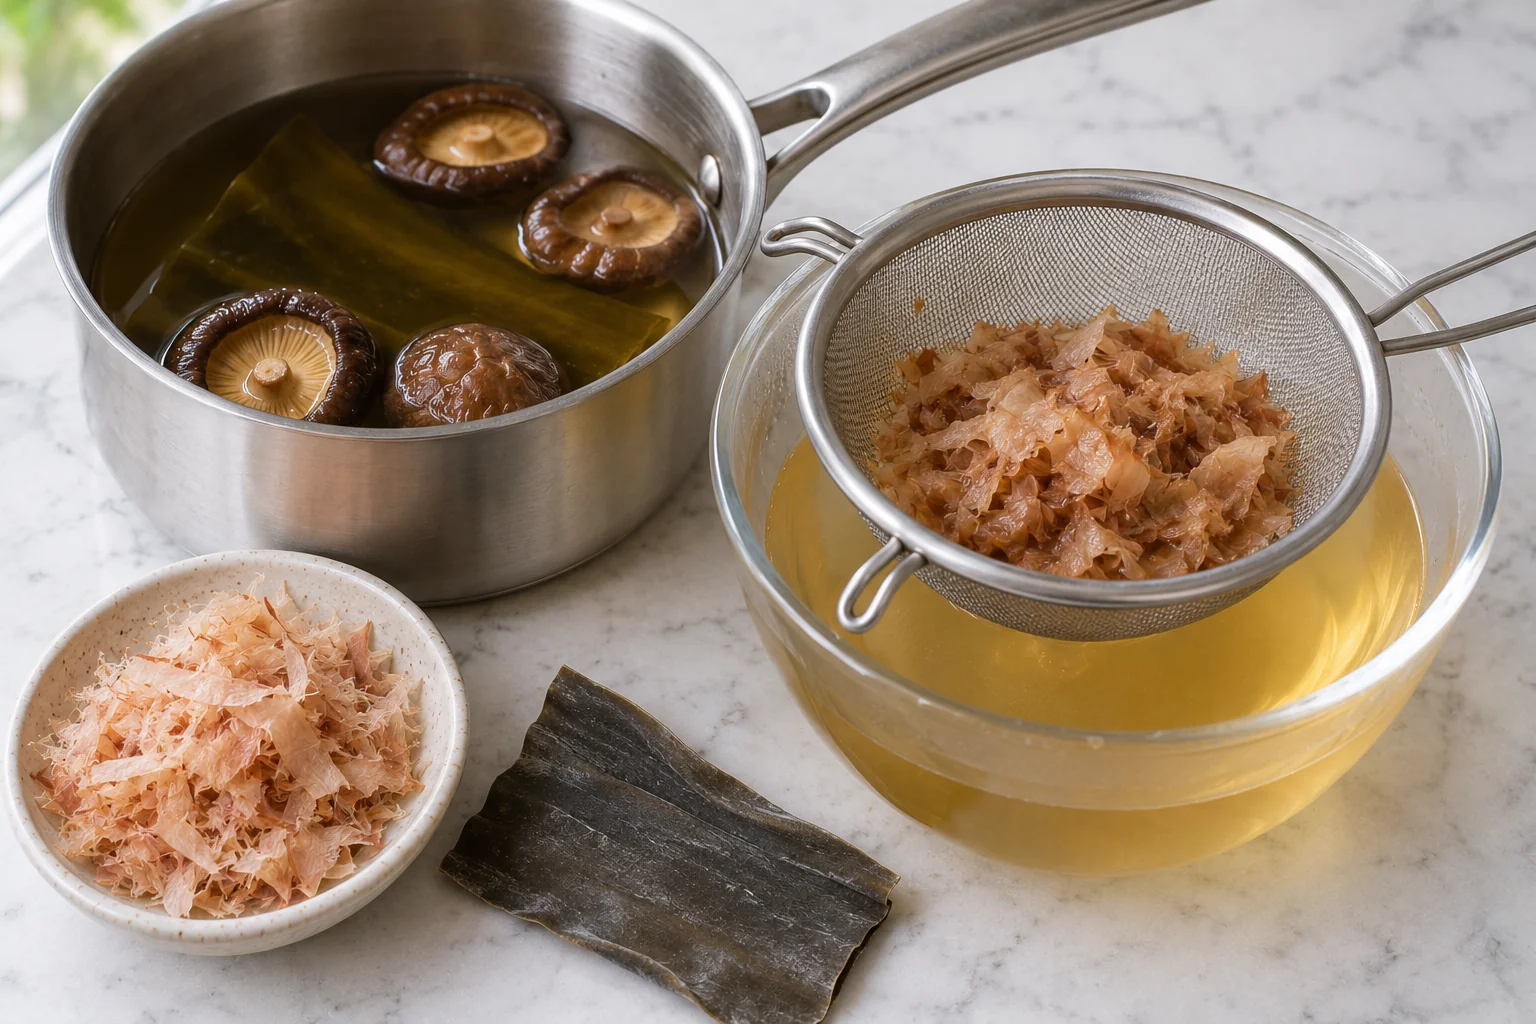
For Level 3, we’re adding Japanese dashi.
Dashi is a stock commonly made using kombu, a dried kelp, and katsuobushi, or dried bonito flakes.
We’re also using dried shiitake mushrooms for another layer of savoury depth.
These ingredients contribute different natural umami compounds.
Kombu is rich in glutamate.
Bonito contributes inosinate.
Dried shiitake contains guanylate.
Together, these compounds can create a stronger savoury impression than any one ingredient on its own.
That’s part of what makes a carefully prepared ramen broth taste so deep and satisfying.
Level 3 · broth
Simple Ramen Dashi
- Makes
- Approximately 750–850mL
Spoon measures: 15 mL tablespoon, 5 mL teaspoon.
Ingredients
- 10g dried kombu
- 4 dried shiitake mushrooms
- 1 litre cold water
- 20g katsuobushi (bonito flakes)
Method
- Soak the kombu and mushrooms. Place the kombu and dried shiitake in the cold water. Soak for at least 1 hour, or refrigerate overnight.
- Heat gently. Transfer the mixture to a saucepan. Heat slowly. Remove the kombu when small bubbles begin forming around the edge, before the water reaches a rolling boil.
- Add the bonito. Turn off the heat. Add the katsuobushi and allow it to steep for approximately 5 minutes.
- Strain. Strain through a fine sieve. Avoid pressing the solids aggressively. The finished dashi should be clear, fragrant and deeply savoury.
How to use it
For four ramen bowls, combine approximately:
- 1.2 litres homemade chicken broth
- 600mL prepared dashi
This produces 1.8 litres of soup base.
The chicken broth provides body.
The dashi contributes a clean, layered savouriness.
Neither needs to be aggressively seasoned yet.
That’s the job of the tare.
The Chashu Pork Masterclass
The meat that makes Level 3 special
One of the most memorable parts of a great ramen bowl is the pork.
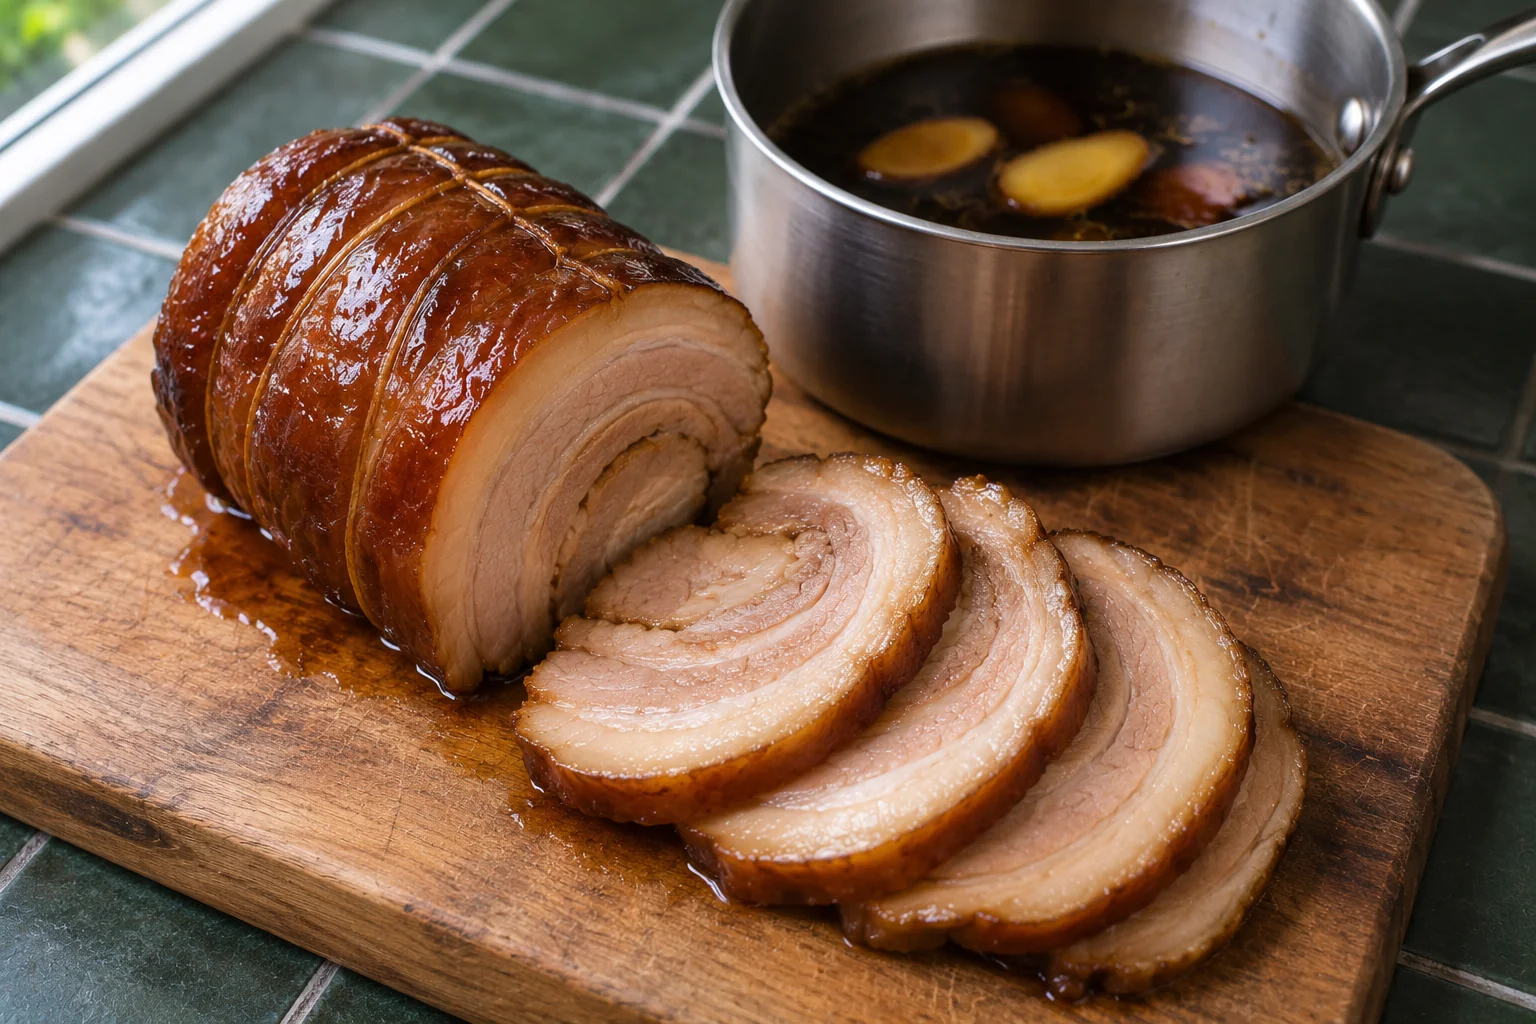
Good chashu is tender, rich, deeply savoury and sliced so that it almost melts into the hot broth.
It’s very different from the crispy pork belly we used in our bánh mì guide.
For ramen, we aren’t chasing crackling.
We’re looking for soft, tender meat and rendered fat infused with soy sauce, mirin, sake and aromatics.
Chashu is inspired by Chinese char siu, but Japanese ramen chashu has developed its own methods and character.
Often, pork belly is rolled and gently braised.
Some restaurants use pork shoulder, neck or other cuts instead.
For our ultimate bowl, we’re using pork belly.
Choosing the pork
Look for approximately 700–800g boneless, skinless pork belly.
Choose a piece with a good balance of meat and fat.
A relatively even thickness helps it cook consistently.
If you want the familiar round slices seen in many ramen shops, you can roll the belly tightly and tie it with kitchen string.
This isn’t essential.
Flat-braised pork belly tastes just as good and may be easier for beginners.
Why braising works
Pork belly contains fat and connective tissue.
Slow, gentle cooking allows collagen to soften and the meat to become tender.
The braising liquid also seasons the pork throughout the cooking process.
The goal isn’t to boil the meat aggressively.
It’s to cook it gently until it’s tender enough to slice without falling apart.
Level 3 · topping
Slow-Braised Chashu Pork Belly
- Serves
- 4 ramen bowls, with possible leftovers
- Prep
- 15–20 minutes
- Cook
- Approximately 2–2½ hours
- Chilling
- Optional but recommended for neat slices
Spoon measures: 15 mL tablespoon, 5 mL teaspoon.
Ingredients
- 700–800g boneless, skinless pork belly
- 125mL Japanese-style soy sauce
- 125mL mirin
- 60mL cooking sake
- 400mL water
- 1 tablespoon white sugar
- 4cm piece fresh ginger, sliced
- 3 garlic cloves, lightly crushed
- 2 spring onion whites, roughly chopped
- 1 teaspoon neutral cooking oil
Method
- Prepare the pork. If rolling the pork, roll it firmly and tie with kitchen string at several points. Otherwise, leave it flat. Pat dry with paper towel.
- Brown the surface. Heat the oil in a heavy saucepan or casserole over medium-high heat. Brown the pork on its exposed sides until lightly golden. This adds roasted flavour to the finished dish.
- Add the braising liquid. Combine the soy sauce, mirin, sake, water, sugar, ginger, garlic and spring onion in the saucepan. Bring to a gentle simmer.
- Braise slowly. Cover with a lid slightly ajar. Cook over low heat for approximately 2–2½ hours, turning the pork occasionally. Adjust the heat to maintain a gentle simmer. Add a little water if the liquid reduces too far. The pork is ready when a skewer or knife passes through the meat with very little resistance. It should be thoroughly cooked and tender, but still hold together.
- Cool the pork. Remove the pork from the braising liquid. Strain the liquid and reserve some for the eggs, if desired. Cool both promptly in shallow containers and refrigerate. Never leave the pork sitting in warm liquid on the bench for hours.
- Slice. For the cleanest slices, chill the pork until firm. Remove the kitchen string and slice into pieces approximately 5–8mm thick.
- Finish before serving. Warm the slices thoroughly in a small amount of hot braising liquid or sear them briefly in a pan, ensuring the pork is heated through. You can also lightly caramelise the surface with a kitchen torch if you already have one and know how to use it safely. It’s not essential.
Watch
Yuto Omura of Sudachi rolls and ties a skinless pork belly, cooks it gently for about two hours, then marinates it overnight in soy sauce, mirin and sake and slices it cold to show the spiral. His method has more steps than ours, so watch it for rolling, tying and slicing, and follow our recipe for the braise.
Video: Ramen Chashu (Japanese Braised Pork Belly) Recipe by Yuto Omura (Sudachi). Watch on YouTube
What makes great chashu?
The pork should be tender enough to bite through easily, with soft layers of fat and savoury meat.
The soy sauce shouldn’t dominate.
You should also taste the sweetness of the mirin, the warmth of the ginger and the richness of the pork itself.
Chashu troubleshooting
The meat is tough: It probably needs more gentle cooking time.
The pork is too salty: The braising liquid may have reduced too much, or the pork was left in an overly concentrated liquid.
The slices fall apart: Chill the cooked pork thoroughly before slicing, and use a sharp knife.
The fat is rubbery: Continue gentle braising until it has softened adequately.
The pork tastes bland: Slice it thinly and reheat with a little of the braising liquid. The sauce should complement the meat rather than overwhelm it.
The Perfect Ramen Egg: Ajitama
A good ramen egg is one of the simplest but most satisfying upgrades you can make.
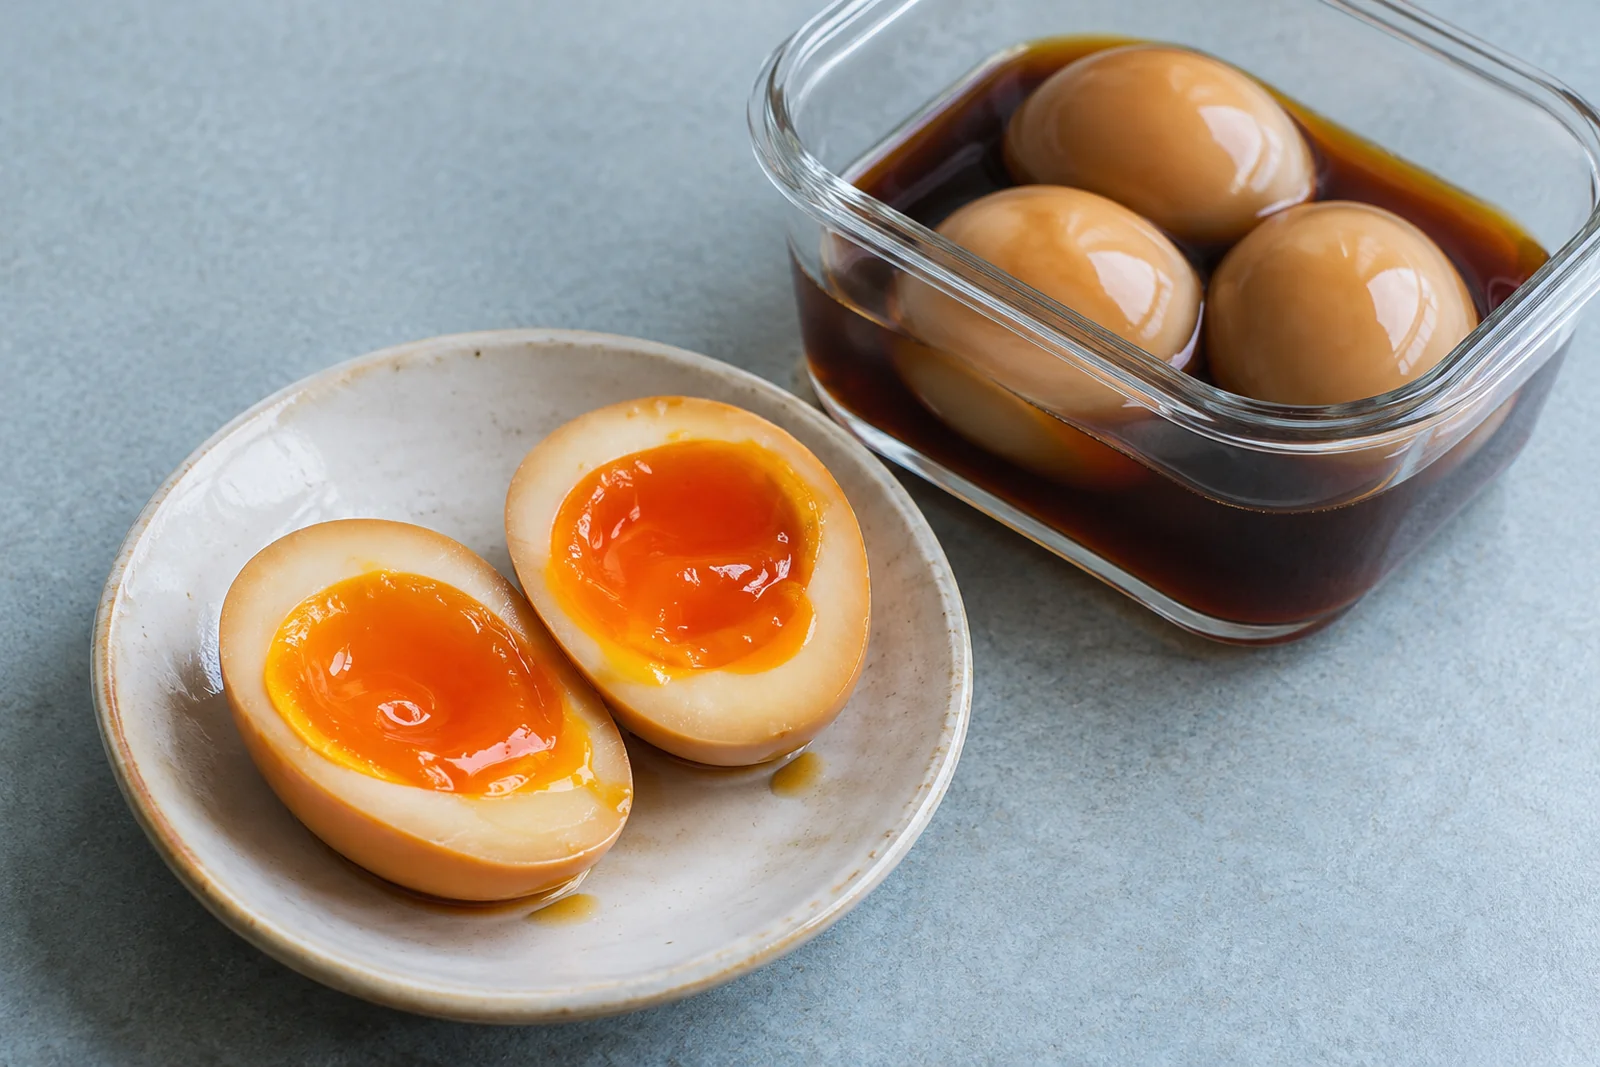
The white should be tender and lightly seasoned.
The yolk should be deep orange, softly set around the edges and jammy in the centre.
And the seasoning should complement the egg rather than make it aggressively salty.
These eggs are often called ajitama, short for ajitsuke tamago, meaning seasoned egg.
Level 3 · topping
Soy-Marinated Ramen Eggs (Ajitama)
- Makes
- 4 eggs
- Prep
- 10 minutes
- Cooking
- 6½–7 minutes
- Marinating
- 4–12 hours, refrigerated
Spoon measures: 15 mL tablespoon, 5 mL teaspoon.
Ingredients
- 4 large eggs
- 60mL Japanese-style soy sauce
- 60mL mirin
- 120mL water
- 1 teaspoon sugar
Method
- Boil the eggs. Bring a saucepan of water to a boil. Carefully lower the eggs into the water. Cook for approximately 6½–7 minutes for a jammy yolk, depending on size and starting temperature.
- Cool immediately. Transfer to a bowl of iced water. Leave until completely cool.
- Peel gently. Tap and roll the shells carefully, then peel. Soft-boiled eggs are delicate, so take your time.
- Prepare the marinade. Warm the mirin with the soy sauce, water and sugar until the sugar dissolves and the mixture is heated through. Cool completely.
- Marinate. Place the peeled eggs in a small food-safe container or bag. Add the cooled marinade. Refrigerate for 4–12 hours, turning occasionally if necessary.
- Serve. Remove the eggs from the marinade. Slice in half just before serving. The whites should have a light amber tint, while the yolks remain soft and rich.
Watch
Marc Matsumoto of No Recipes shows how to soft-boil, peel and marinate ramen eggs. His marinade adds chicken stock, sake and ginger to the soy sauce and he leaves the eggs overnight, so watch it for the egg technique and use our recipe for the marinade and timing.
Video: EASY Ramen Egg Recipe (味付け玉子 - Ajitsuke Tamago) by Marc Matsumoto (No Recipes). Watch on YouTube
How long can you keep ramen eggs?
These lightly marinated, soft-centred eggs should be kept refrigerated and eaten within two days.
The marinade does not make them shelf-stable.
For pregnant people, young children, older adults and people with weakened immune systems, use fully cooked eggs rather than runny or jammy yolks.
Finishing the Ultimate Bowl
We’ve now prepared the most time-consuming components.
The broth is ready.
The chashu is tender.
The eggs are marinated.
Now we need three final things: tare, aroma oil and the classic toppings.
Advanced Shoyu Tare
Ingredients
Makes enough for approximately 4–6 bowls.
- 125mL Japanese-style soy sauce
- 2 tablespoons mirin (30mL)
- 2 tablespoons sake (30mL)
- 5cm piece kombu
- 5g katsuobushi
Method
Combine the soy sauce, mirin and sake in a small saucepan.
Heat gently until the mixture is steaming.
Remove from the heat.
Add the kombu and bonito flakes and steep for approximately 20–30 minutes.
Strain.
Use approximately 1½–2 tablespoons per serving bowl initially, adjusting to taste depending on the saltiness of your broth and soy sauce.
The tare is concentrated, so taste the assembled soup before adding more.
Spring Onion and Garlic Aroma Oil
Ingredients
- 60mL neutral cooking oil
- Green parts of 3 spring onions, roughly chopped
- 1 garlic clove, thinly sliced
Method
Place the oil, spring onion and garlic in a small saucepan.
Warm gently over low heat.
Cook for approximately 8–10 minutes, until fragrant and the garlic is lightly golden.
Don’t allow the garlic to burn.
Strain the oil into a clean container.
Use approximately 1–2 teaspoons per bowl.
Recipe: Ultimate Shoyu Ramen
Level 3 recipe card
Ultimate Shoyu Ramen
- Serves
- 4
- Prep
- Approximately 45 minutes of active work, across components
- Cooking
- Several hours, much of it unattended
- Additional
- Overnight preparation and egg marinating recommended
- Difficulty
- Advanced
Spoon measures: 15 mL tablespoon, 5 mL teaspoon.
Ingredients
- 1.2 litres homemade chicken broth, prepared using an appropriately scaled batch of the Level 2 broth recipe
- 600mL prepared dashi
- 4 portions fresh ramen noodles, approximately 120–150g each
- 8–12 slices prepared chashu pork
- 4 soy-marinated ramen eggs
- 6–8 tablespoons prepared shoyu tare, or to taste
- 4–8 teaspoons spring onion and garlic aroma oil
- 100g seasoned bamboo shoots (menma)
- 2 sheets nori, cut into rectangles
- 2 spring onions, thinly sliced
- Optional: a pinch of white pepper or MSG
Method
- Prepare everything before cooking the noodles. Slice the chashu. Halve the eggs. Cut the nori and spring onions. Prepare the bamboo shoots. Have your tare and aroma oil ready. Once the noodles are cooked, you’ll need to assemble quickly.
- Heat the soup. Combine the chicken broth and dashi in a large saucepan. Heat until piping hot. Avoid vigorous boiling once the dashi has been added.
- Warm the pork. Reheat the chashu slices thoroughly in a little of their braising liquid, or use a hot pan to lightly caramelise them.
- Warm the bowls. Fill four ramen bowls with hot water. Leave briefly, then empty them. This helps the soup stay hot while you’re assembling.
- Add tare and oil. Add approximately 1½ tablespoons of shoyu tare and 1 teaspoon aroma oil to each warm bowl. You can increase either after tasting.
- Add the broth. Ladle approximately 450mL of the hot chicken-dashi broth into each bowl. Stir gently. Taste carefully. Adjust the seasoning if necessary.
- Cook the noodles. Cook the fresh ramen noodles in a separate large pot of boiling water, following the packet instructions. Drain thoroughly.
- Add the noodles. Divide the noodles between the four bowls. Lift them gently through the soup so they settle evenly.
- Arrange the toppings. Add the warm chashu slices. Place a halved ramen egg in each bowl. Add bamboo shoots, spring onion and nori. Keep the nori partly above the broth so it doesn’t become completely soggy immediately.
- Serve. Serve straight away. Don’t leave the finished bowls sitting around while you prepare other ingredients. Ramen noodles continue absorbing liquid, and their texture changes quickly.
What should Level 3 taste like?
The broth should be savoury, aromatic and rounded, with depth from both chicken and dashi.
The tare should provide flavour without overwhelming everything with salt.
The pork should be soft and rich.
The eggs should add a creamy contrast.
The nori and bamboo shoots should offer their own distinct flavours and textures.
And the noodles should still have that lovely springy bite.
This is the reward for preparing everything carefully.
The Ramen Pantry: What Each Ingredient Actually Does
A lot of the ingredients used in ramen are pantry staples that can be used in dozens of other Japanese and Asian dishes.
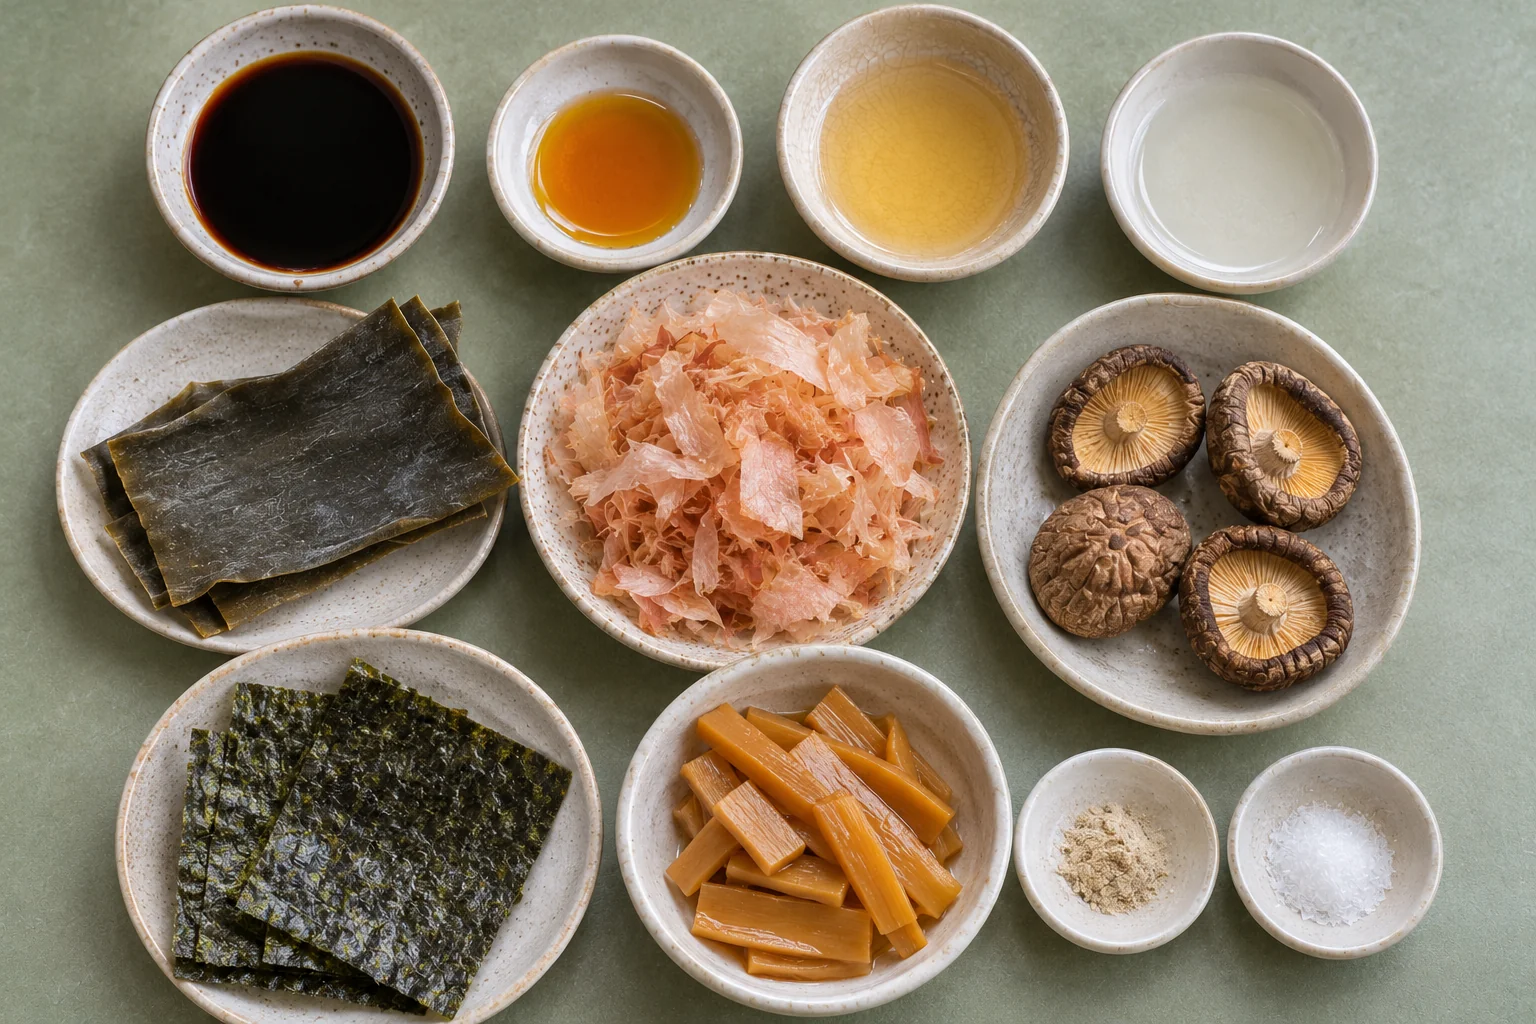
Learning what they contribute is much more useful than simply buying them for one recipe.
| Ingredient | What it does | When we introduce it |
|---|---|---|
| Japanese soy sauce | Savoury seasoning and shoyu flavour | Level 1 |
| Toasted sesame oil | Nutty aroma | Level 1 |
| Mirin | Gentle sweetness and rounded flavour | Level 2 |
| Sake | Adds complexity to tare and braising | Level 2, optional |
| Kombu | Deep, clean umami from dried kelp | Level 3 |
| Katsuobushi | Savoury bonito flavour | Level 3 |
| Dried shiitake | Earthy depth and umami | Level 3 |
| Nori | Seaweed aroma and flavour | Level 3 |
| Menma | Seasoned bamboo shoots for texture | Level 3 |
| White pepper | Gentle earthy warmth | Optional |
| MSG | Extra umami seasoning | Optional |
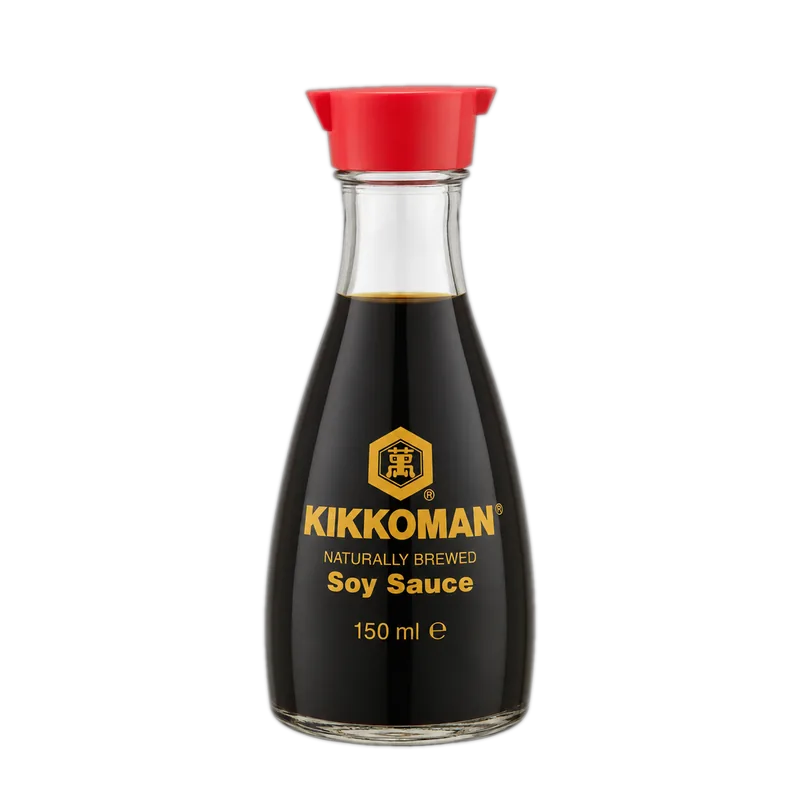
Why Japanese soy sauce?
Japanese-style soy sauce, often called shoyu, generally has a different flavour profile from Chinese light and dark soy sauces.
Many Japanese soy sauces contain both soybeans and wheat, giving them a rounded fermented character.
For this guide, a Japanese-style naturally brewed soy sauce is a good starting point.
You can substitute Chinese light soy sauce if that’s what you have, but the result may be slightly different.
Why mirin?
Mirin brings sweetness and complexity.
It softens the sharper edges of soy sauce and works beautifully in tare, marinades and braising liquids.
Some supermarket products labelled “mirin seasoning” contain different amounts of alcohol and sugar, so check what you’re buying.
What does kombu add?
Kombu is dried kelp.
It’s one of the essential ingredients in traditional Japanese dashi.
It contributes a deep savoury flavour without requiring meat or bones.
Used with chicken broth, it can make the soup taste noticeably more complex.
What’s the point of bonito flakes?
Katsuobushi is dried, fermented and smoked skipjack tuna, shaved into thin flakes.
It’s a traditional ingredient in many Japanese dashi preparations.
It contributes a distinctive marine savouriness and works particularly well with kombu.
Is nori necessary?
No.
Nori is a common finishing touch in many styles of ramen, but not every bowl needs it.
It contributes a subtle toasted seaweed aroma.
Use good-quality nori and add it just before serving.
What is menma?
Menma is seasoned bamboo shoot, commonly used as a ramen topping.
It has a slightly chewy, crunchy texture and a savoury flavour.
You can buy prepared menma from some Japanese and Asian grocers.
Five Common Ramen Mistakes
1. Overcooking the noodles
Ramen noodles cook quickly, especially fresh noodles.
Once they go into the hot soup, they continue absorbing liquid.
Cook them according to the packet and assemble the bowl immediately.
2. Making the broth too salty
Remember that the tare is concentrated.
Start with a smaller amount and taste.
Different soy sauces and stocks have different salt levels.
There’s no universal measurement that works for every combination.
3. Cooking the noodles in your carefully prepared broth
The noodles release starch into the cooking liquid.
That can make your broth cloudy and change its texture.
Use a separate pot of boiling water whenever possible.
4. Adding cold toppings
Cold meat and refrigerated eggs can quickly lower the temperature of the finished bowl.
Warm the meat thoroughly.
Warm the bowls.
Keep the broth hot.
Add the eggs at the last moment.
5. Trying to do everything at once
Level 3 has several components.
Make the pork, broth and marinated eggs ahead of time.
Ramen is much easier when the final assembly takes only a few minutes.
Other Types of Ramen Worth Exploring
Once you’ve learned how broth, tare, oil, noodles and toppings fit together, you’ll be able to appreciate how different ramen styles are constructed.
Miso Ramen
Miso ramen uses fermented soybean paste as a major seasoning component.
It’s particularly associated with Sapporo, where rich miso ramen is often served with ingredients such as pork, bean sprouts, corn and butter.
Tonkotsu Ramen
Tonkotsu ramen is made from pork bones cooked to produce a rich, cloudy, emulsified broth.
It’s quite different from the clear chicken broth used in this guide.
The characteristic creaminess comes largely from the cooking and emulsification of fats, proteins and gelatin.
Shio Ramen
Shio ramen is seasoned primarily with salt-based tare.
It can be beautifully light and delicate, allowing the underlying broth to shine.
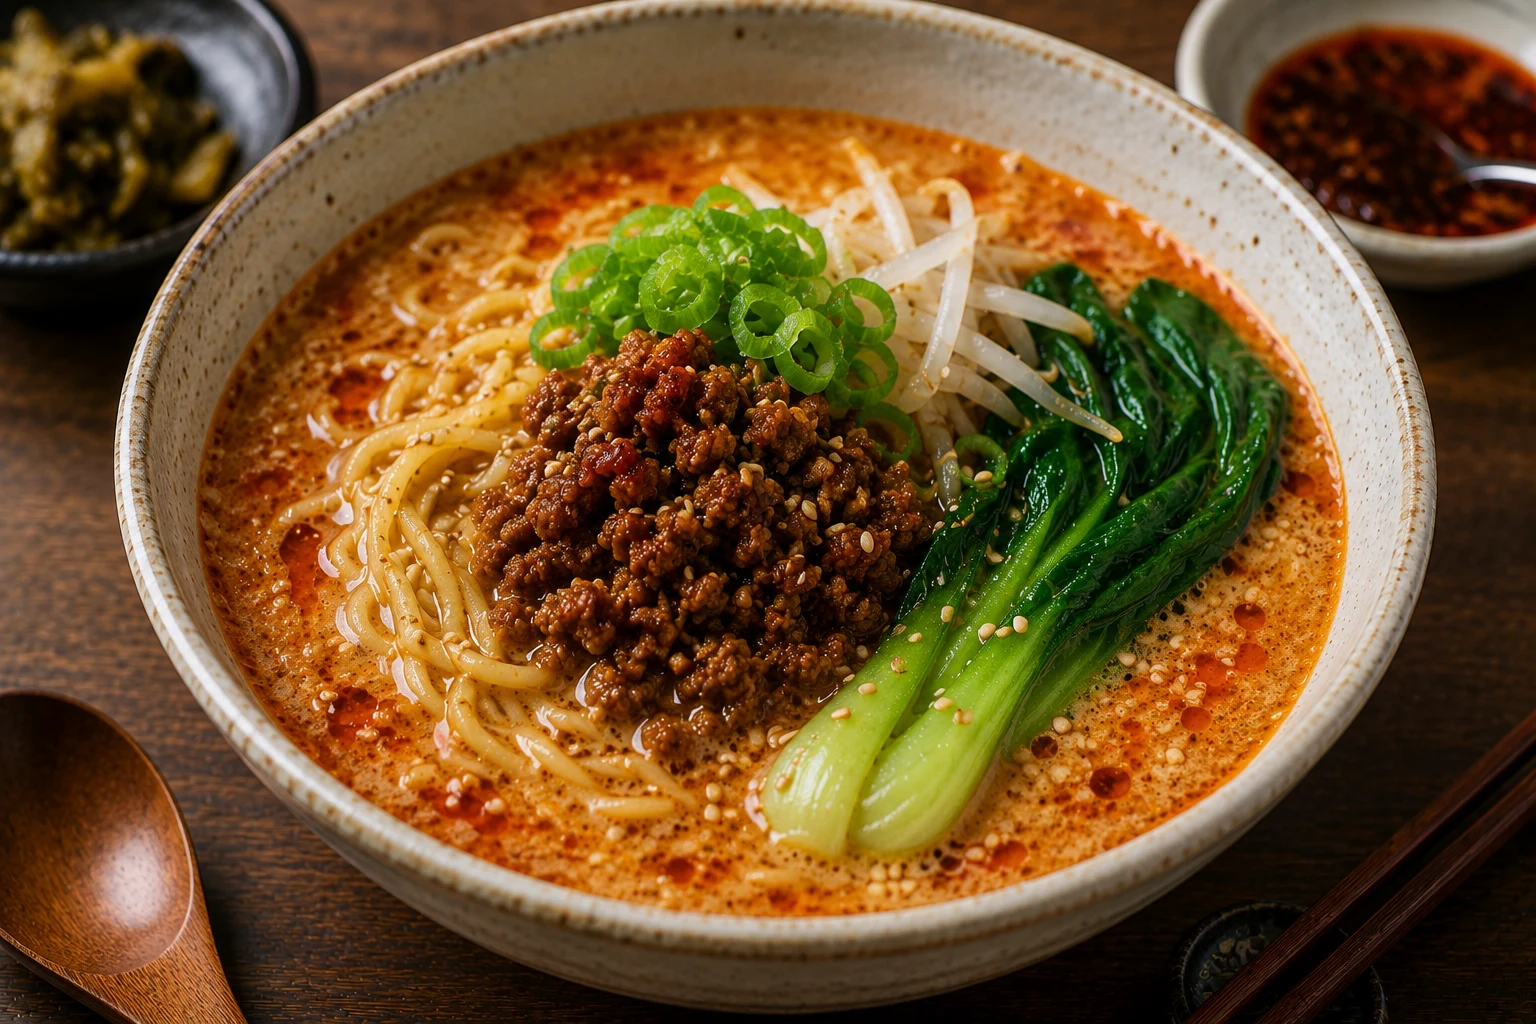
Tantanmen
Japanese tantanmen is inspired by Chinese dandan noodles.
It commonly features sesame-based richness, chilli and seasoned minced meat.
It’s an excellent choice when you want something creamy, savoury and spicy.
Tsukemen
Tsukemen is a style of ramen in which noodles are served separately from a concentrated dipping broth.
You dip the noodles into the soup as you eat.
It’s a completely different experience from a traditional bowl of ramen.
Frequently Asked Questions About Homemade Ramen
Can you make good ramen with instant noodles?
Absolutely. Instant noodles are a convenient starting point. Adding fresh aromatics, a little carefully balanced seasoning, vegetables and an egg can improve the result significantly.
What’s the difference between ramen and instant noodles?
Ramen is a broad category of Japanese noodle dishes, usually featuring wheat noodles served with a seasoned broth and toppings. Instant ramen is a convenient, pre-cooked and dried version designed for quick preparation.
What is ramen broth made from?
It depends on the style. Chicken, pork bones, seafood, vegetables, kombu, bonito flakes and dried mushrooms can all contribute to ramen broth.
What is tare in ramen?
Tare is a concentrated seasoning mixture used to flavour ramen broth. Common styles include shoyu, shio and miso tare.
Can you use chicken stock for ramen?
Yes. Good-quality chicken stock is a practical starting point for homemade ramen. You can improve it with ginger, garlic, soy-based tare and aromatic oil.
Are egg noodles the same as ramen noodles?
Not exactly. Traditional ramen noodles are generally alkaline wheat noodles made with kansui, which contributes their characteristic springy texture. Some other yellow egg noodles may look similar but behave differently.
Do you need a ramen machine?
No. Excellent fresh ramen noodles are available from Japanese and Asian grocers. Making noodles from scratch is an interesting project, but not necessary for a great homemade bowl.
What is chashu pork?
Chashu is a Japanese preparation of seasoned pork commonly used as a ramen topping. It’s often braised or roasted until tender, then sliced and served with the noodles.
What are ramen eggs?
Ramen eggs, often called ajitama, are cooked eggs marinated in a savoury mixture commonly containing soy sauce and mirin. Jammy yolks are popular, although fully cooked eggs are a safer choice for people at higher risk of foodborne illness.
How do you make ramen taste more like a restaurant?
Focus on the individual components: a properly prepared broth, balanced tare, suitable noodles, aromatic oil and well-made toppings. Simply adding more soy sauce or chilli oil won’t replicate the depth of a carefully constructed bowl.
Can you prepare ramen in advance?
Yes. Broth, chashu, tare and aromatic oil can be prepared ahead of time, cooled and refrigerated safely. Cook the noodles and assemble the bowl immediately before serving.
How do you store homemade ramen broth?
Cool it promptly in shallow containers, refrigerate below 5°C and use within two to three days, or freeze in suitable portions. Reheat thoroughly before serving.
Is homemade ramen worth the effort?
It depends on what you’re after. A fifteen-minute upgraded instant ramen is excellent when you want convenience. A homemade chicken ramen gives you more control over flavour. A weekend ramen-shop bowl is worth making when you enjoy the process as much as the result.
The Final Word: Great Ramen Is Built, Not Just Boiled
The most satisfying thing about learning to make ramen is discovering that it’s not one mysterious recipe.
It’s a collection of techniques.
At Level 1, you learn how a few fresh ingredients can transform a packet of instant noodles.
At Level 2, you discover how broth, tare and proper noodles create a much more complete bowl.
And at Level 3, you learn why a good ramen shop spends so much time preparing the meat, eggs, broth and seasonings before a single noodle is cooked.
You don’t have to do all of that every time.
Sometimes a packet of instant noodles is exactly what you want.
Sometimes it’s worth making a proper chicken broth.
And sometimes, when you’ve got a free weekend, there’s nothing better than spending a little extra time making something extraordinary.
Start simple. Understand the ingredients. Build a better bowl.
Mr Pantry — Good food starts in the pantry.