How to Make Bánh Mì: 3 Levels, From Simple to Extraordinary
One Vietnamese sandwich, three levels: a simple pork roll, a bakery-style upgrade with pâté and pickles, and the ultimate crispy pork belly bánh mì.
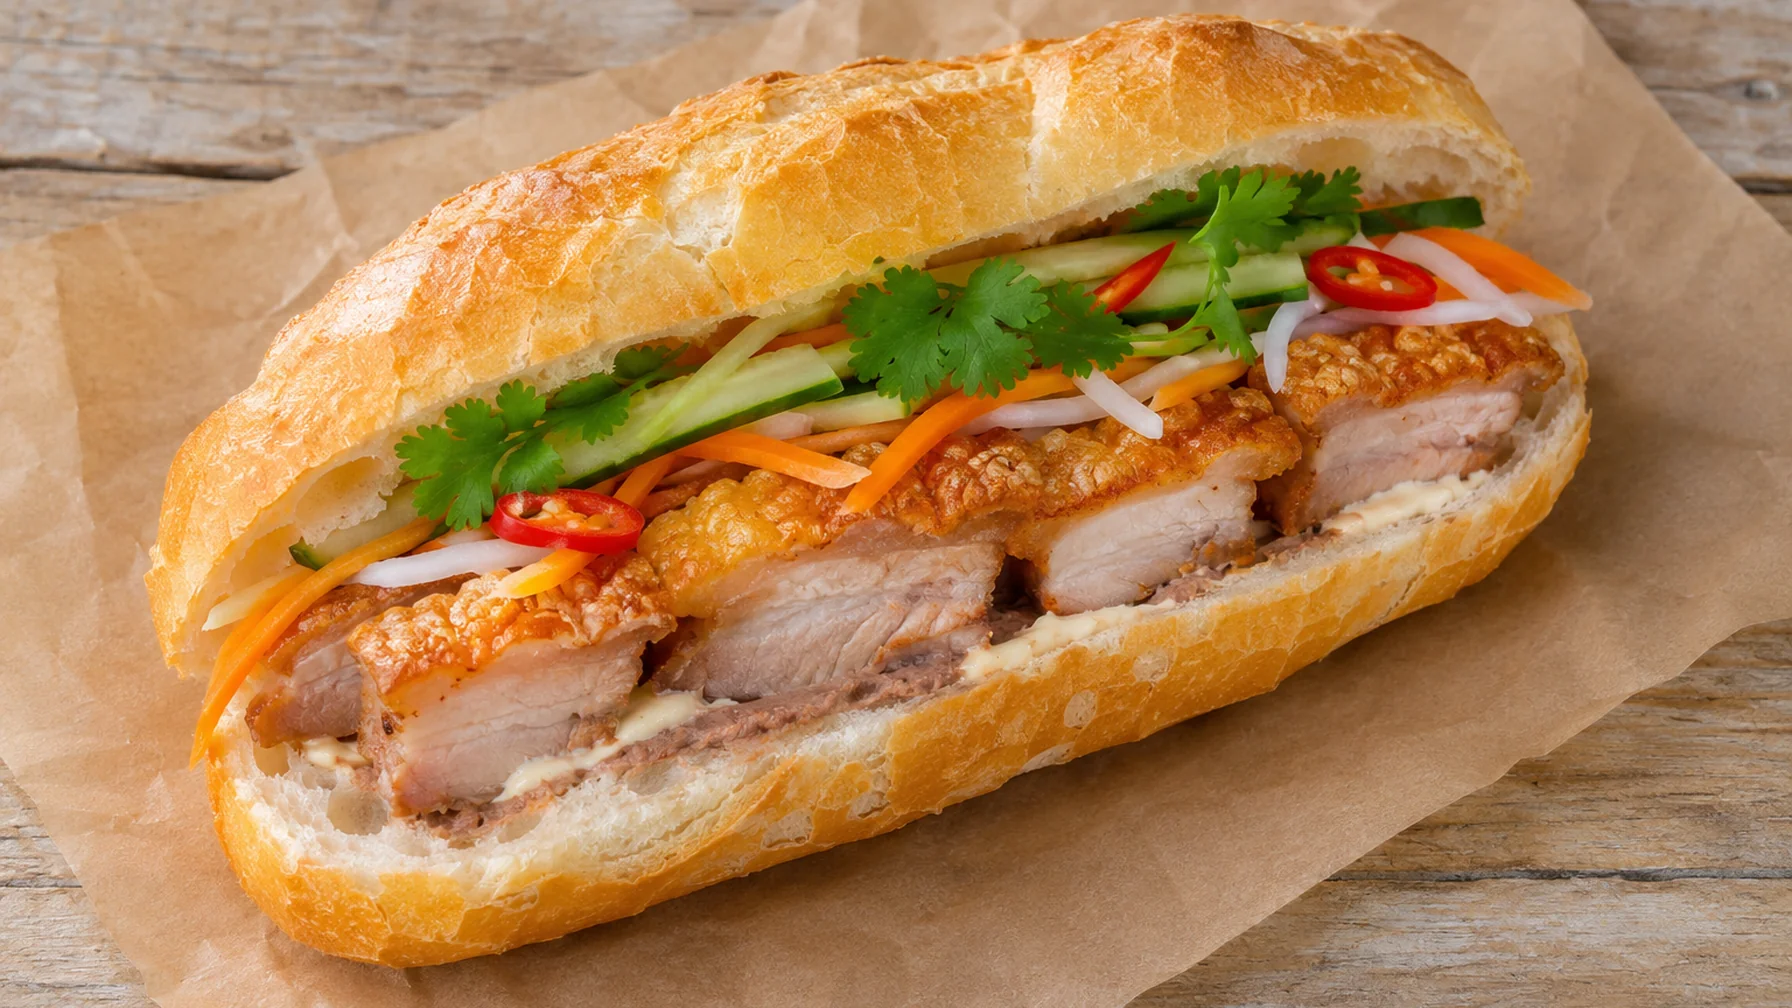
One Vietnamese sandwich. Three levels. From a quick pork roll to the ultimate crispy pork bánh mì, here's how to get every layer right.
A good bánh mì is one of the great sandwiches of the world.
There's the bread, for starters. Thin, crisp and almost impossibly light. Then the rich meat, the cool cucumber, fresh coriander, sharp pickles, creamy pâté and that little hit of savoury seasoning that somehow brings everything together.
It's crunchy, rich, fresh, salty, sweet and sour, often in the same mouthful.
But here's the interesting thing: you don't need all those ingredients to make a good bánh mì.
You can start with a warm Vietnamese roll, some cooked pork, mayonnaise and a handful of fresh ingredients. It'll be delicious.
Add a layer of pâté and proper Vietnamese pickles, and suddenly you've got something that tastes much closer to the sandwiches from a good Vietnamese bakery.
Then take it one step further. Make your own crispy roast pork belly, with golden, blistered crackling. Get the bread, spreads and seasoning just right. That's when a simple sandwich becomes something pretty special.
This guide teaches you how to build that sandwich, one level at a time.
We aren't making three completely different recipes. We're starting with the basics and showing you exactly what each new ingredient and technique brings to the table.
By the end, you'll understand how to make a genuinely excellent bánh mì — and why the little details matter so much.
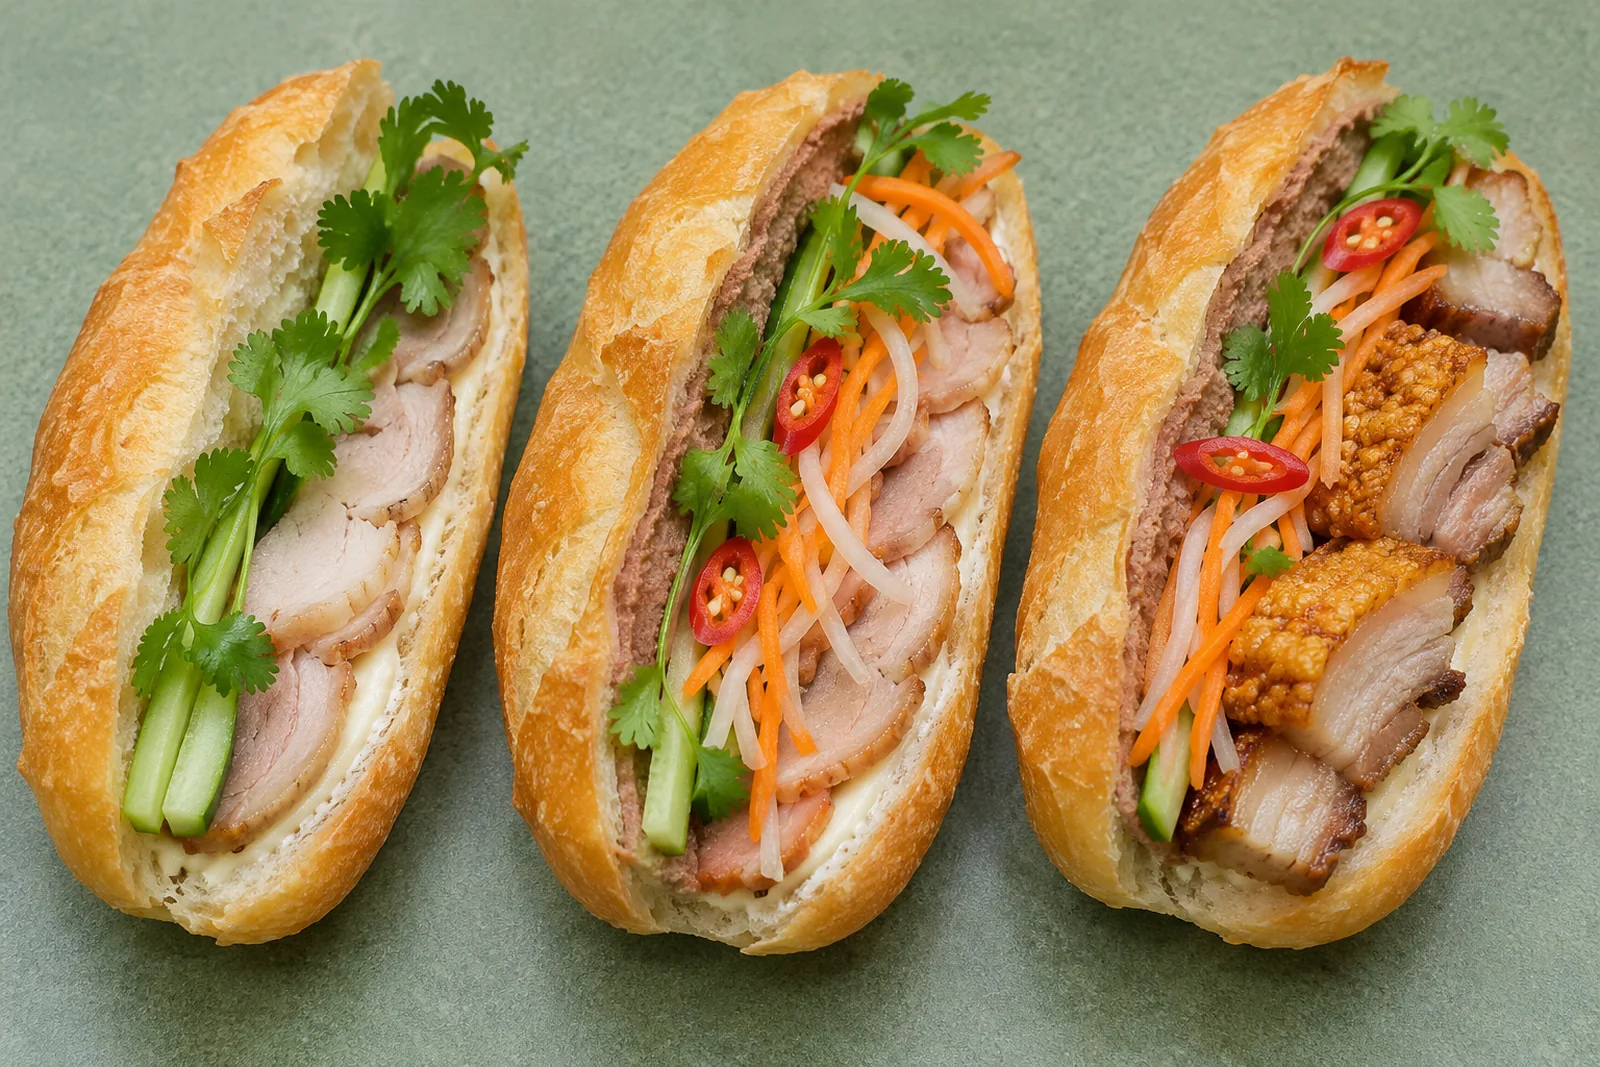
Choose your level
| What you're making | Time | Difficulty | |
|---|---|---|---|
| Level 1 | Simple Pork Bánh Mì | 15 minutes | Beginner |
| Level 2 | The Bakery-Style Upgrade | 25 minutes, plus pickling | Intermediate |
| Level 3 | The Ultimate Crispy Pork Bánh Mì | Overnight preparation, then 2–3 hours of roasting and finishing | Advanced |
Level 1 is a brilliant quick lunch.
Level 2 introduces the richness and acidity that make bánh mì so distinctive.
Level 3 is for when you've got a bit of time and want to make something genuinely impressive.
The beauty is that you can stop at any level. And once you've learned what each ingredient contributes, you can make the sandwich exactly how you like it.
First, what makes a great bánh mì?
Before we start assembling anything, let's look at the five components that make this sandwich work.
They're simple enough on their own. It's how they come together that makes bánh mì special.

1. The bread: light, airy and properly crisp
The bread is arguably the most important ingredient.
A Vietnamese bánh mì roll isn't quite the same as a traditional French baguette.
Although the sandwich has roots in French colonial influence, Vietnamese bakers developed a lighter style of bread with a thin, crackly crust and soft, airy interior.
A great bánh mì roll should feel surprisingly light in your hand.
When you bite into it, the crust should crackle rather than fight back. The bread should collapse slightly around the filling instead of making you chew through a thick, tough shell.
What to look for:
- A short roll, typically around 20–25cm long.
- A thin, golden crust that cracks easily.
- A light, open crumb rather than dense, chewy bread.
- Enough structure to hold the fillings without dominating them.
You may hear people say Vietnamese baguettes have to be made with rice flour. That's not necessarily true. Many excellent Vietnamese rolls use wheat flour, and their characteristic texture comes from the recipe, dough handling and baking process.
Where to buy the right bread
Your best option is a Vietnamese bakery.
In Australia, we're lucky to have plenty of excellent Vietnamese bakeries making these rolls fresh throughout the day.
If you can't find one, look for the lightest, crispest white baguette-style roll available.
Avoid dense sourdough, heavy supermarket baguettes or very chewy artisan bread.
They're lovely in their own right, but they produce a completely different sandwich.
The trick to restoring the crunch
Even a good Vietnamese roll can lose some of its crispness after a few hours.
A short blast in a hot oven can bring it back.
Heat your oven to 180°C fan-forced and warm the roll for around 3–5 minutes.
You want it crisp and warm, not hard, dry or deeply toasted.
Don't microwave it. That tends to soften the crust and can make the bread rubbery.
2. The protein: good meat, not necessarily fancy meat
Bánh mì can contain all sorts of fillings.
Roast pork, grilled pork, Vietnamese pork roll, cold cuts, chicken, meatballs, eggs and tofu are all common in different versions.
For this guide, we're sticking with pork.
At Level 1, we'll use ordinary cooked pork.
At Level 2, we'll keep that same pork and improve the ingredients around it.
At Level 3, we'll upgrade the meat to homemade Vietnamese crispy roast pork belly, known as heo quay.
This lets you see just how much difference each element makes.
3. The spreads: more important than you think
There's a reason a good bánh mì doesn't taste like dry bread with some meat thrown in.
The spreads add moisture, richness and flavour.
Mayonnaise is the easiest place to start. It gives the bread a creamy layer and prevents the sandwich from feeling dry.
Pâté introduces something more complex: a rich, savoury, slightly earthy flavour that works beautifully with pork and pickled vegetables.
Different bakeries use different spreads, including egg-based mayonnaise, butter-like spreads and liver pâté.
You don't need all of them in every sandwich.
But understanding their different roles is one of the keys to making better bánh mì.
4. The vegetables: freshness, crunch and acidity
Fresh cucumber and coriander provide a lovely contrast to the rich meat and bread.
Then there are the pickles.
Vietnamese pickled carrot and daikon, known as đồ chua, add sweetness, acidity and crunch.
They're particularly important when the sandwich contains fatty pork or pâté.
Without acidity, those rich ingredients can become a little heavy.
The pickles balance them.
We'll make our own at Level 2.
5. The seasoning: a little goes a long way
A small amount of savoury seasoning can give the finished sandwich an extra dimension.
Some Vietnamese bakeries use Maggi Seasoning or another soy-based seasoning sauce.
Others rely on the seasoning already in the meat, pâté and spreads.
Neither approach is wrong.
The important thing is to use seasoning deliberately, not drown the sandwich in sauce.
We're leaving it out of the first two levels, then introducing it as the final touch in Level 3.
Level 1: The Simple Pork Bánh Mì
Five ingredients, one great sandwich
Let's start with the most straightforward version.
We're using a light, crisp Vietnamese roll, some ready-cooked pork, mayonnaise, cucumber and coriander.
That's it.
No pâté. No pickles. No chilli sauce. No Maggi.
This isn't intended to recreate a fully loaded traditional bakery sandwich. It's our stripped-back starting point, designed to teach the foundations without asking you to make several ingredients from scratch.
And when those foundations are right, it's still a very good lunch.
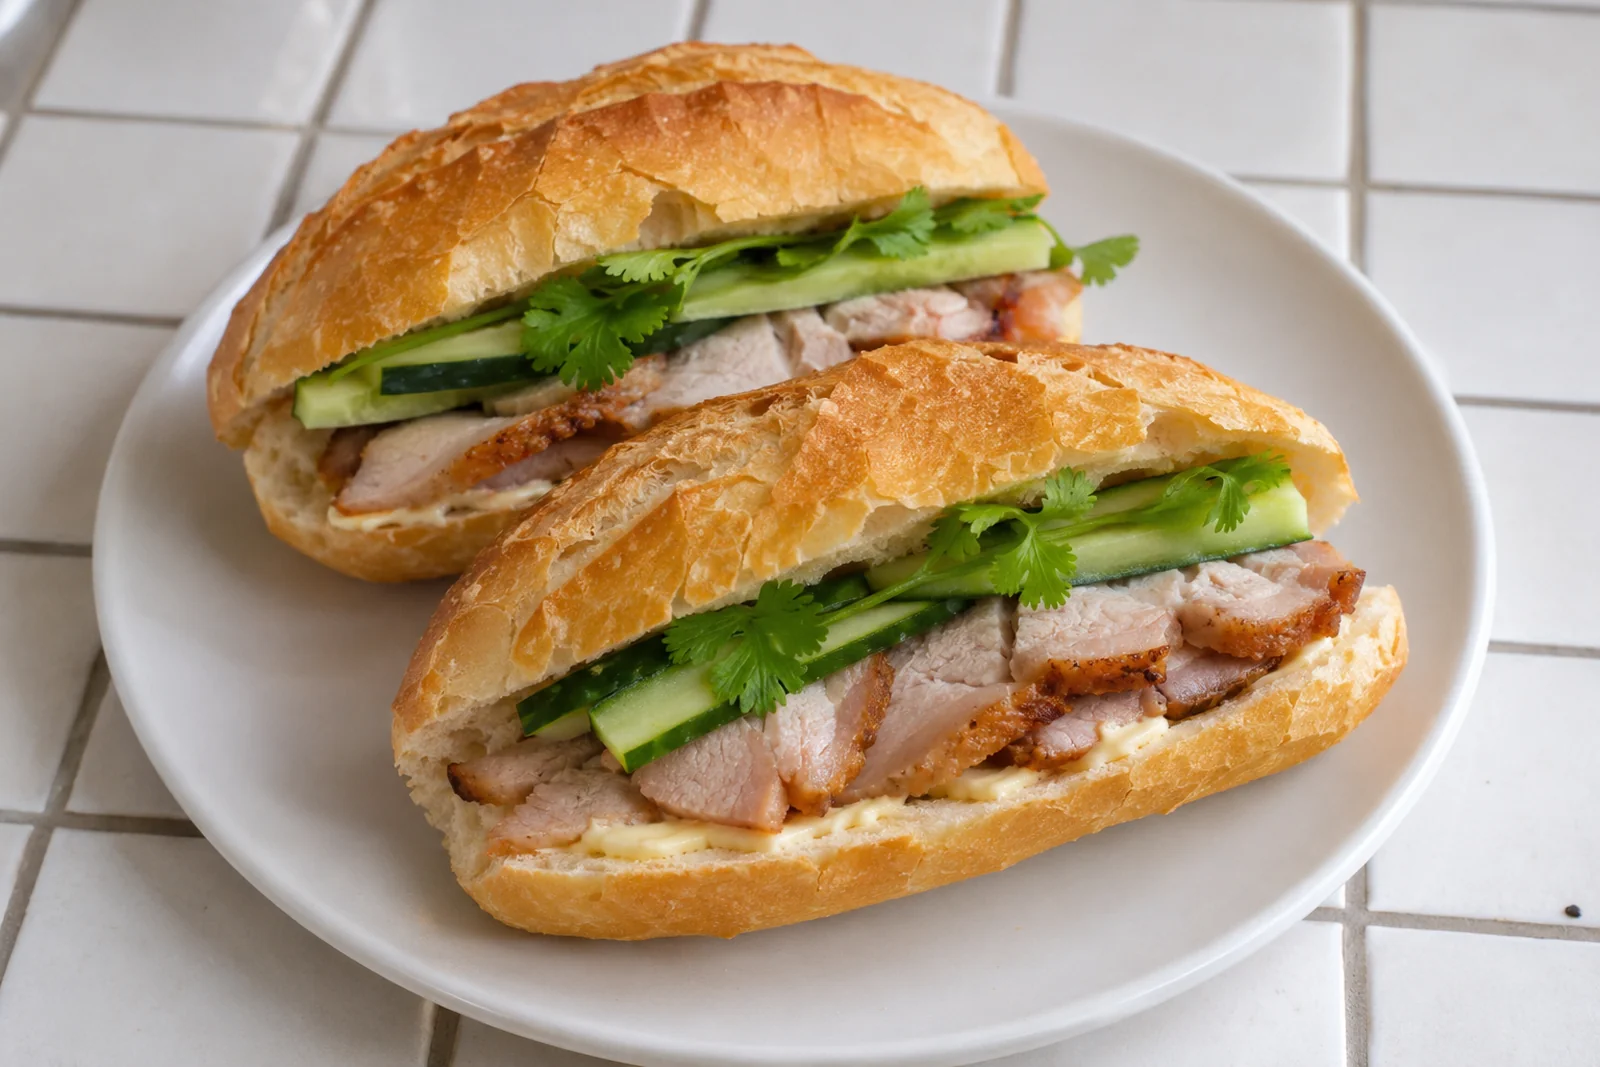
Level 1 · Beginner
Simple Pork Bánh Mì
- Serves
- 2
- Preparation
- 10 minutes
- Cooking
- 5 minutes
- Difficulty
- Beginner
Spoon measures: 15 mL tablespoon, 5 mL teaspoon.
Ingredients
- 2 Vietnamese-style baguette rolls, approximately 20–25cm each
- 180–200g ready-cooked roast pork, thinly sliced
- 2 tablespoons whole-egg mayonnaise (30mL total)
- ½ Lebanese cucumber, cut into thin lengthwise batons
- 1 small handful fresh coriander sprigs
Method
- Warm the bread. Preheat your oven to 180°C fan-forced. Place the rolls directly onto an oven rack and warm for 3–5 minutes until the crust is crisp. Don't leave them too long. The bread should feel light and crackly, not hard.
- Prepare the pork. Slice the cooked pork into thin, manageable pieces. If it's freshly cooked and warm, you can use it straight away. If you're using chilled leftover pork, reheat it thoroughly until steaming hot before assembling the sandwich. The slices should be thin enough to bite through easily without pulling all the filling out of the roll.
- Prepare the vegetables. Slice the cucumber lengthwise into thin batons, keeping some of the green skin attached. Wash and thoroughly dry the coriander. Keep the coriander in small sprigs rather than chopping it into tiny pieces.
- Open the roll. Using a bread knife, cut along one side of the roll, leaving the opposite side attached like a hinge. Open it gently. If the bread has an unusually thick interior, you can remove a little of the soft crumb to create more room. Don't hollow it out completely.
- Add the mayonnaise. Spread approximately 1 tablespoon of mayonnaise inside each roll. Take it right to the ends, so the first and last bites aren't dry.
- Add the pork. Divide the pork evenly between the two rolls. Arrange it along the length of the bread rather than piling it into the centre.
- Finish with the fresh ingredients. Add the cucumber batons and coriander sprigs. Close the roll gently and serve immediately.
What should Level 1 taste like?
Simple, fresh and satisfying.
The bread provides the crunch. The mayonnaise adds richness. The pork brings savoury flavour, while the cucumber and coriander keep everything fresh.
There's nothing complicated happening here.
And that's the point.
Ready for the upgrade?
Level 1 is good.
But you'll notice something if you compare it with a bánh mì from a really good Vietnamese bakery.
It's missing a little depth.
The pork and mayonnaise are rich, but there's nothing sharp or tangy to balance them.
That's exactly what we're going to fix next.
Level 2: The Bakery-Style Upgrade
Same sandwich. Three new ingredients. Completely different result.
This is where things start to get interesting.
We're keeping the bread, pork, mayonnaise, cucumber and coriander from Level 1.
But now we're introducing three additions:
- Pâté: Rich, savoury depth.
- Pickled carrot and daikon: Sweetness, acidity and crunch.
- Fresh chilli: Optional heat and freshness.
None of these ingredients is especially complicated.
But together, they make a huge difference.
The pâté gives the sandwich a deeper, more savoury flavour. The pickles balance that richness with acidity, and the chilli adds a little excitement.
This is much closer to the combination of flavours people associate with a classic Vietnamese bakery bánh mì.
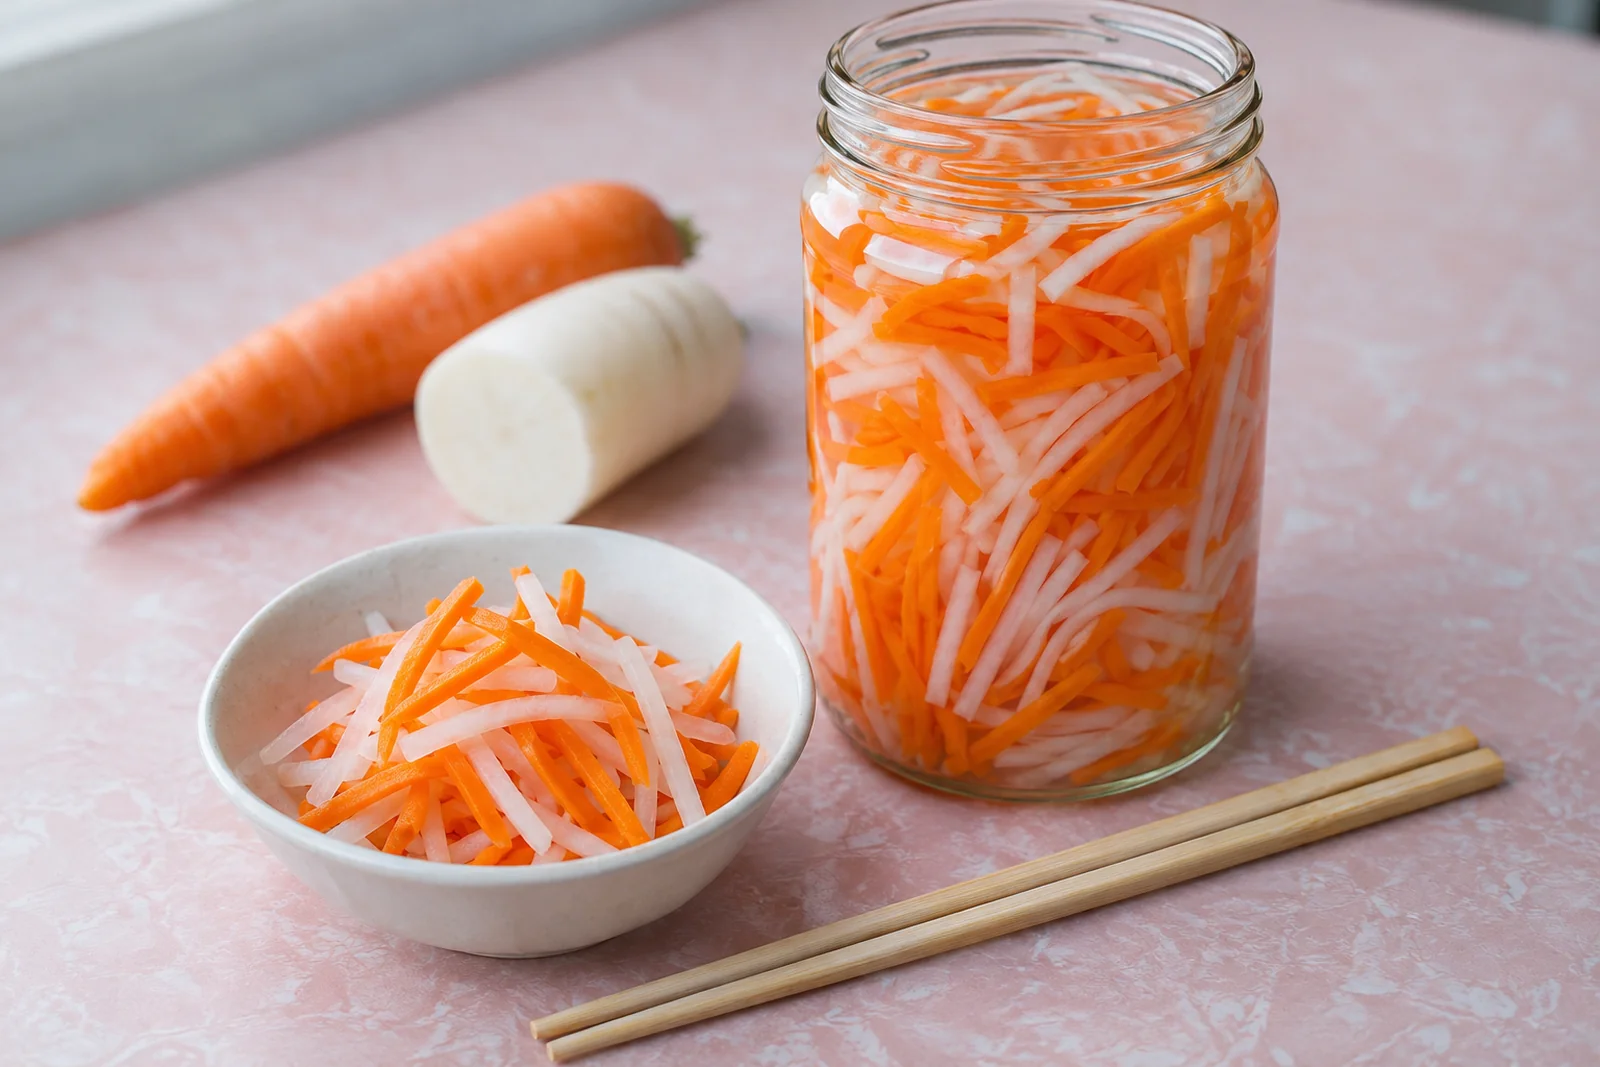
First, make the pickles: Đồ Chua
Vietnamese pickled carrot and daikon are among the simplest things you can make at home.
They're also incredibly useful.
Beyond bánh mì, they work beautifully with grilled meats, rice noodle bowls, salads and other Vietnamese dishes.
You only need a handful of ingredients and a little patience.
Level 2 · The pickles
Đồ Chua (Vietnamese Pickled Carrot and Daikon)
- Makes
- Enough for approximately 6–8 sandwiches
- Pickling
- At least 1 hour, refrigerated
- Keeps
- About 5 days, refrigerated
Ingredients
- 150g carrot, peeled
- 150g daikon radish, peeled
- 100mL rice vinegar
- 100mL water
- 40g white sugar
- ½ teaspoon fine salt
Method
- Cut the vegetables. Slice the carrot and daikon into thin matchsticks. Aim for roughly 2–3mm thickness. You want them fine enough to bend slightly while still retaining a good crunch. A mandoline with a julienne attachment makes this easier, but a sharp knife works perfectly well.
- Make the pickling liquid. Combine the vinegar, water, sugar and salt in a small saucepan. Warm gently, stirring until the sugar and salt dissolve. There's no need to boil the mixture. Allow it to cool.
- Add the vegetables. Pack the carrot and daikon into a clean container. Pour over the cooled pickling liquid, making sure the vegetables are submerged.
- Refrigerate. Cover and refrigerate for at least 1 hour. A few hours is better, and overnight gives the flavours more time to develop.
What should the pickles taste like?
Bright, lightly sweet, gently sour and crunchy.
They shouldn't be aggressively vinegary.
If the brine tastes too sharp for your preference, add a little more water and sugar.
If it tastes too sweet, add a small splash of rice vinegar.
The goal is balance.
What about the pâté?
Pâté is the ingredient that many people leave out when making bánh mì at home.
Which is a shame, because it contributes a lot.
Vietnamese-style liver pâté has a rich, savoury, slightly earthy character that works particularly well with pork and pickled vegetables.
When spread thinly across the bread, it gives the sandwich a deeper flavour without needing loads of extra sauce.
You don't need to make it yourself.
A good-quality smooth chicken liver pâté from a supermarket or deli is a perfectly reasonable starting point.
Look for something smooth, spreadable and savoury rather than heavily sweetened or flavoured with unusual additions.
We'll use a modest amount.
Too much pâté can overwhelm the other ingredients.

Level 2 · Intermediate
The Bakery-Style Pork Bánh Mì
- Serves
- 2
- Preparation
- 20–25 minutes, excluding pickling time
- Cooking
- 5 minutes, plus reheating pork if needed
- Difficulty
- Intermediate
Spoon measures: 15 mL tablespoon, 5 mL teaspoon.
Ingredients
For the sandwich
- 2 Vietnamese-style baguette rolls
- 180–200g ready-cooked roast pork, thinly sliced
- 2 tablespoons whole-egg mayonnaise (30mL total)
- 40g smooth chicken liver pâté
- 100g prepared Vietnamese carrot and daikon pickles, well drained
- ½ Lebanese cucumber, cut into thin batons
- 1 small handful coriander sprigs
- ½ long red chilli, thinly sliced (optional)
For the pickles, use the đồ chua recipe above.
Method
- Prepare your ingredients. Drain the pickled vegetables well. Slice the cucumber and chilli, and wash and dry the coriander. Bring the pâté out of the fridge only when you're ready to assemble.
- Warm the bread. Heat the rolls in a 180°C fan-forced oven for 3–5 minutes.
- Prepare the pork. Thinly slice the cooked roast pork. If it's chilled, reheat thoroughly until steaming hot.
- Spread the bread. Open each roll along one side. Spread 1 tablespoon of mayonnaise across one interior surface of each roll. Spread approximately 20g of pâté across the opposite side. Keep the pâté reasonably thin and even.
- Add the pork. Divide the pork between the rolls. Make an even layer along the length of the sandwich.
- Add the pickles. Place approximately 50g of well-drained carrot and daikon pickles over the pork in each roll. Spread them out so every bite gets a little acidity and crunch.
- Add cucumber, coriander and chilli. Lay the cucumber batons along the sandwich. Add the coriander sprigs and a few thin slices of chilli if you like some heat.
- Serve. Close the roll gently and eat immediately while the bread is crisp.
Note
- Pregnant? Refrigerated pâté is a listeria risk. The NSW Food Authority advises avoiding it during pregnancy (canned or shelf-stable pâté is fine), so leave it out or choose a shelf-stable one.
What should Level 2 taste like?
This is a much more complex sandwich.
The pâté introduces a deep savoury richness that wasn't present in Level 1.
The pickles bring sweetness, acidity and crunch.
The chilli, if you're using it, adds a little heat without overwhelming the other ingredients.
Most importantly, the flavours balance each other.
The richer the pork and pâté, the more useful those sharp, crunchy pickles become.
A note on mayonnaise and pâté
Some Vietnamese bakeries use both generously, while others lean more heavily towards one spread.
There isn't one universal formula.
Our recommendation is to begin with a thin layer of each.
You can always adjust the balance next time.
And if you don't enjoy pâté, leave it out. The pickles alone will make a noticeable improvement.
Level 3: The Ultimate Crispy Pork Bánh Mì
The weekend project that's worth the effort
Now we're getting serious.
We've learned how to choose the right bread, build the sandwich and balance rich ingredients with sharp, crunchy pickles.
For Level 3, we're taking everything we've learned and upgrading the most important component: the pork.
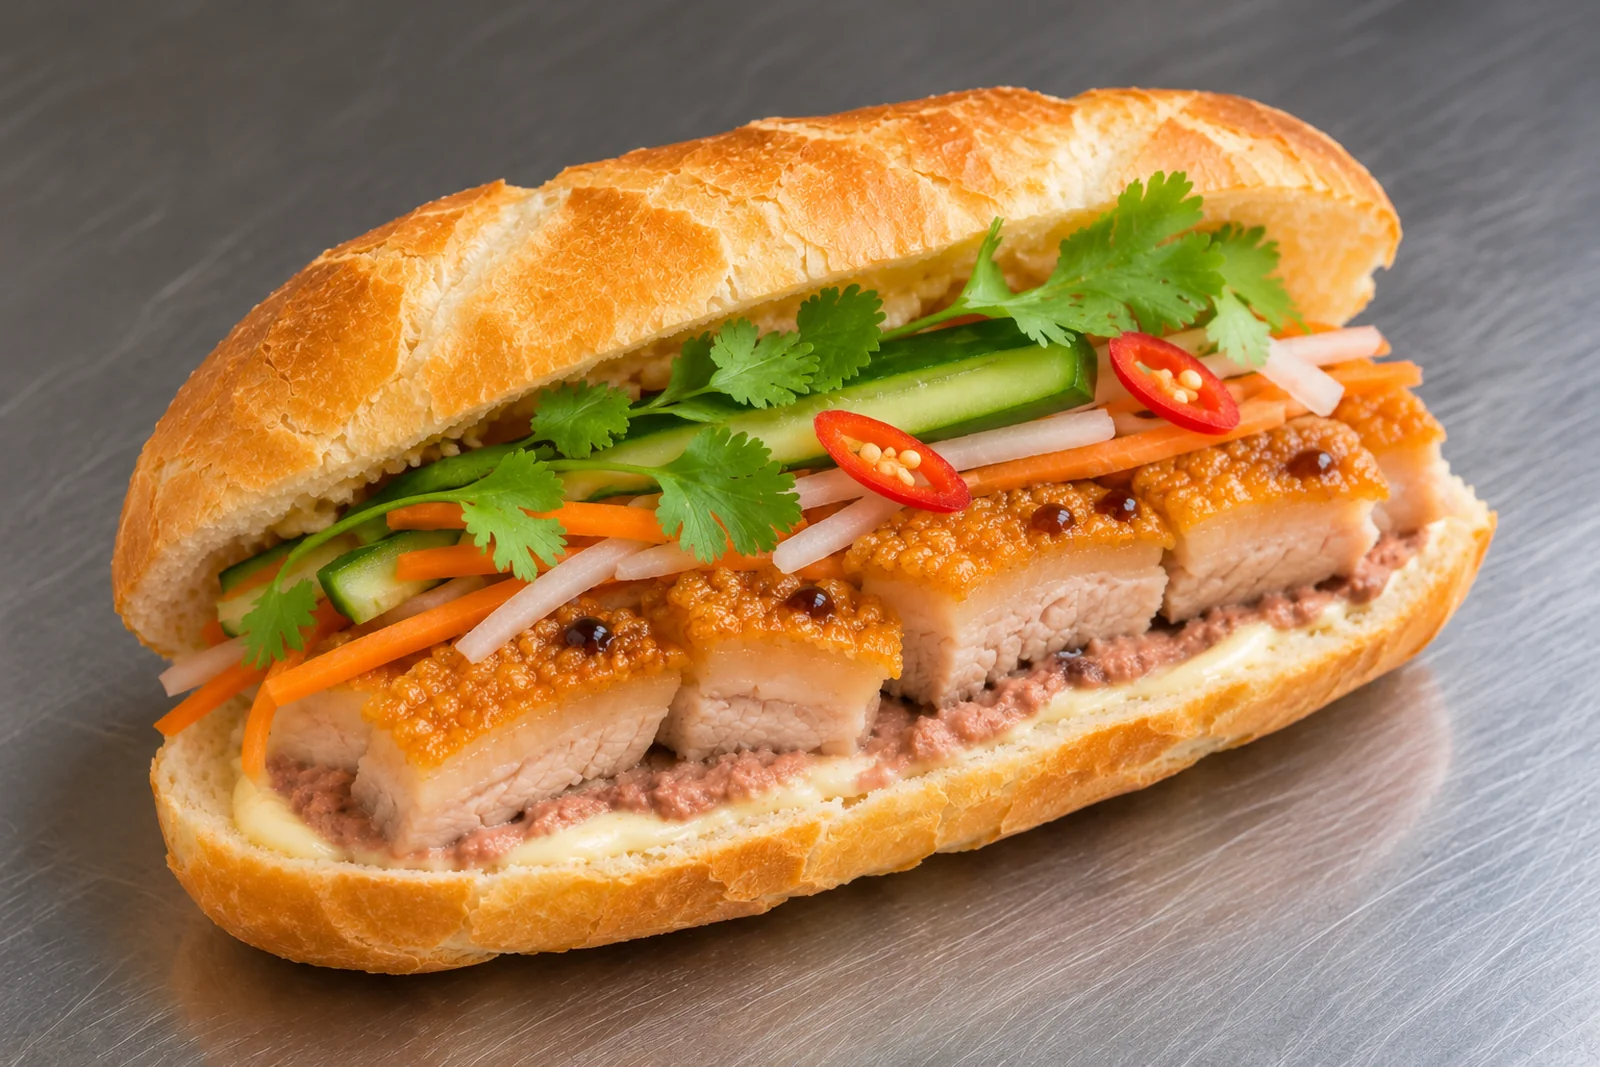
We're making Vietnamese crispy roast pork belly, or heo quay.
The goal is pork belly with a beautifully golden, blistered crust, properly rendered fat and juicy, tender meat underneath.
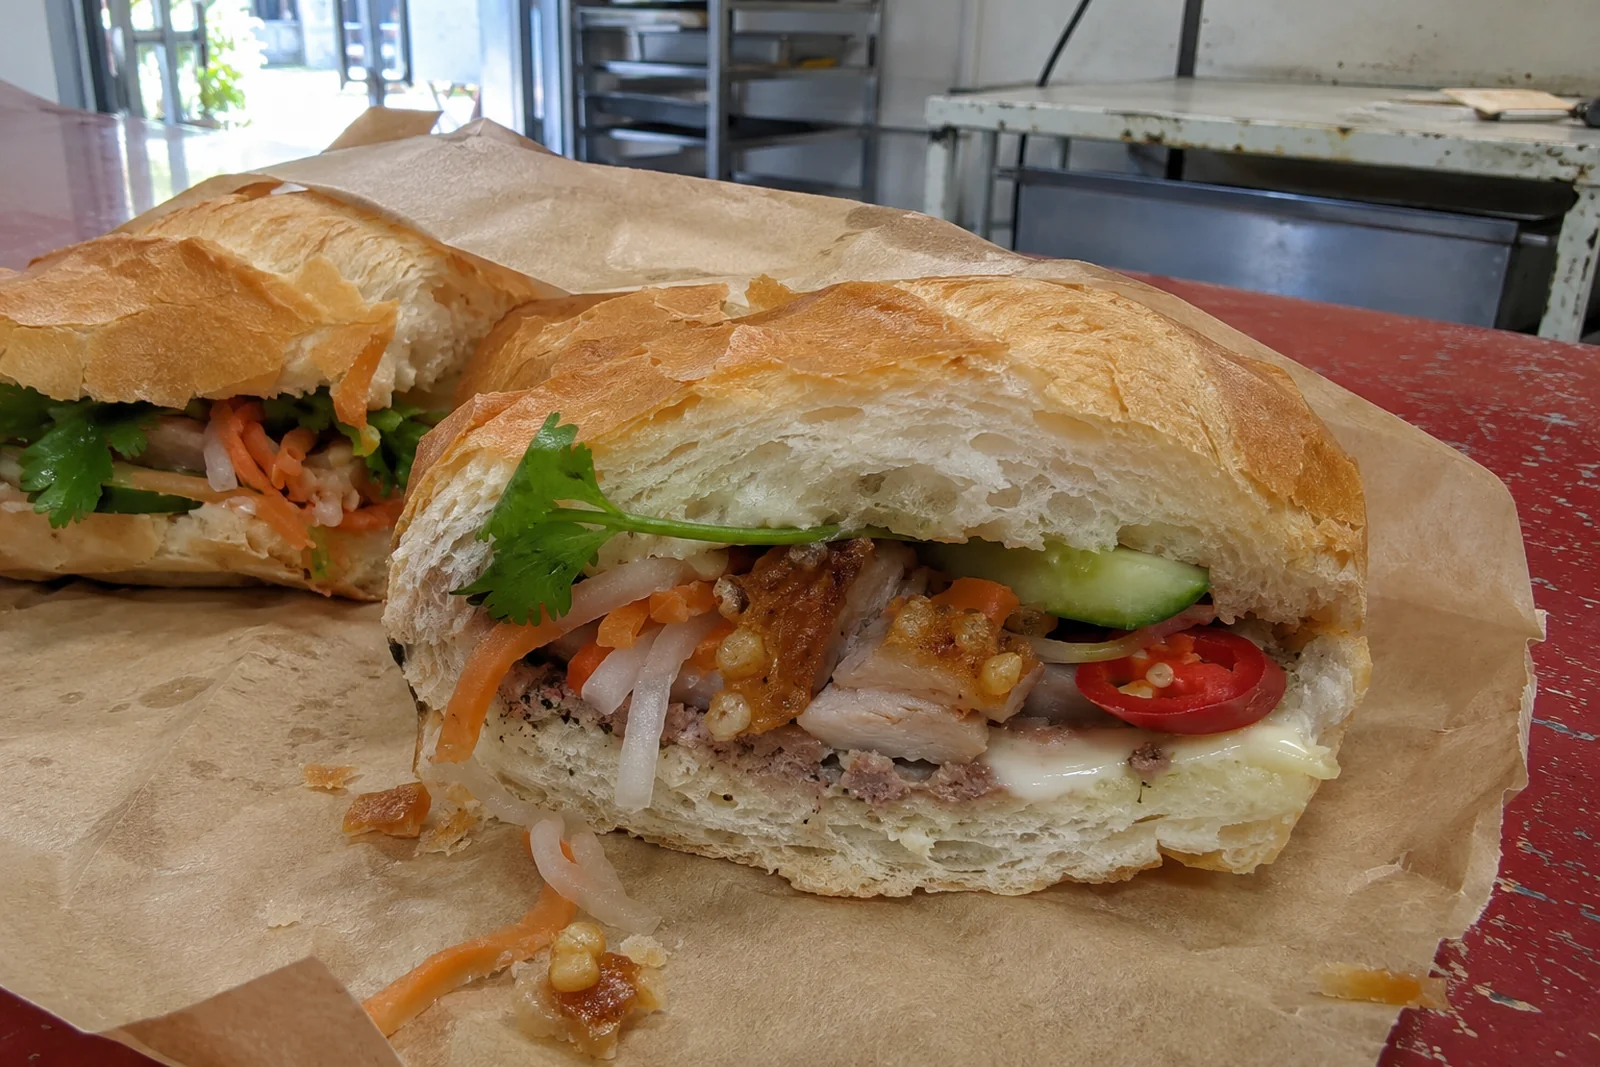
When you bite into the finished bánh mì, the crackling should break with a proper crunch.
Then you get the rich pork, smooth pâté, creamy mayonnaise, sharp pickles and fresh herbs.
Finish it with a few drops of Maggi Seasoning, and you've got something that feels genuinely special.
This is our ultimate homemade version of bánh mì heo quay.
It's different from bánh mì đặc biệt, the mixed-meat special commonly made with Vietnamese cold cuts, pork roll and pâté.
We're focusing on one exceptional protein rather than lots of different meats.
And we're giving it the attention it deserves.
The secret to excellent crispy pork belly
Making pork belly with crispy skin isn't particularly difficult.
But it's unforgiving if you ignore a few important details.
There are three things we need to get right.
- Dry skin: Moisture prevents the surface from crisping effectively.
- Proper cooking: The meat and fat need sufficient time to cook and become tender.
- A hot finish: The skin needs enough heat to puff, blister and turn into crackling.
Those three elements need to work together.
A piece of pork belly with beautiful crackling but tough meat underneath isn't a success.
Neither is perfectly tender pork with rubbery skin.
We're aiming for both.
The Crispy Pork Belly Masterclass
Step 1: Choose the right cut
Start with skin-on pork belly.
You want a piece with relatively even thickness and a good balance of meat and fat.
For this recipe, approximately 1–1.2kg is a practical size.
Look for:
- An intact skin layer without large cuts or tears.
- A relatively flat, even piece.
- Alternating layers of meat and fat.
- A thickness that's fairly consistent across the whole piece.
Avoid pieces that taper dramatically from one end to the other.
Thin sections can dry out before thicker sections are ready.
Should you buy boneless pork belly?
For sandwiches, boneless pork belly is easiest.
It's simpler to roast evenly and much easier to slice into manageable pieces once cooked.
Should you score the skin?
You don't have to.
Some traditional methods score pork skin, while others prick it repeatedly with fine holes.
For our method, we're keeping the skin intact rather than cutting deep lines through it.
This helps keep the meat juices and marinade away from the surface.
If you choose to prick the skin, use a suitable sharp skin-pricking tool and work carefully. You want shallow holes in the skin, not deep punctures into the meat.
It's optional for this method, but it can encourage an evenly blistered finish.
Step 2: Keep the skin as dry as possible
This is one of the most important stages.
If the skin is wet when it goes into the oven, a lot of energy is spent evaporating that moisture before browning and blistering can happen.
That makes good crackling harder to achieve.
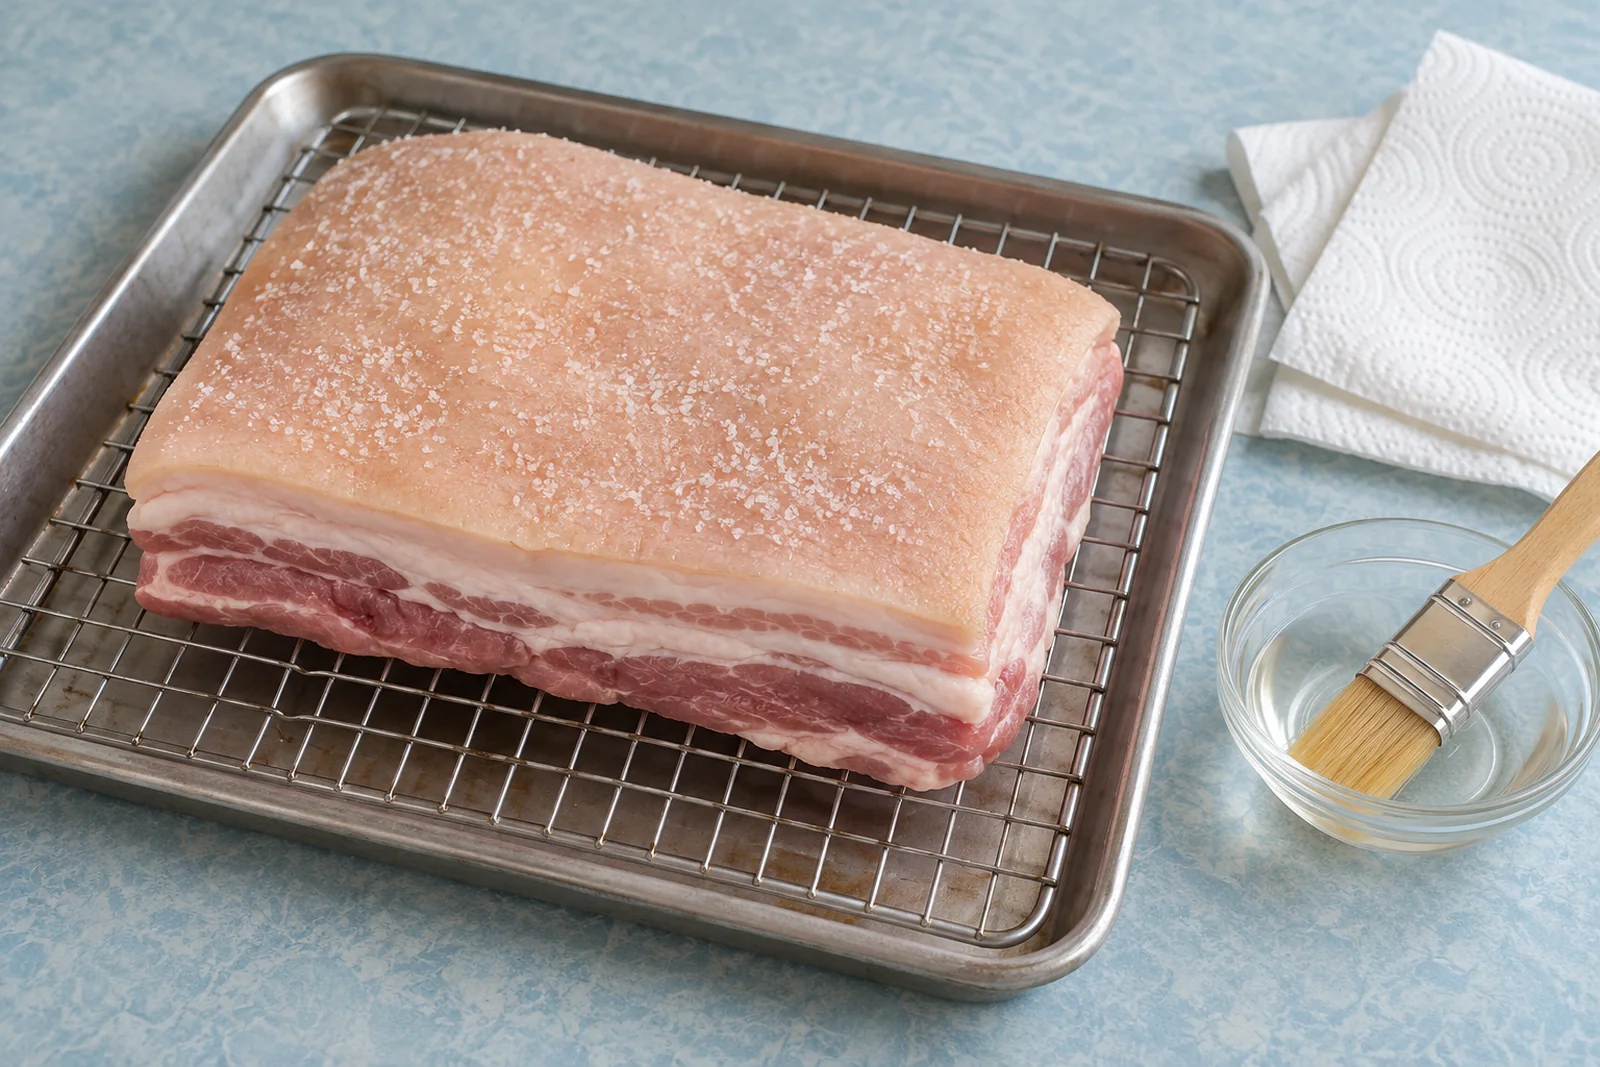
Pat the skin thoroughly dry with paper towel.
If there's visible moisture, keep blotting until the surface feels dry.
Some Vietnamese roasting methods use vinegar or salt as part of the skin preparation. We'll use a small amount of vinegar, followed by thorough drying and an overnight rest in the fridge.
The vinegar isn't a magic ingredient.
The bigger priorities are keeping the skin clean, protecting it from wet marinades and giving it time to dry.
Step 3: Season the meat, not the skin
Pork belly is rich, but that doesn't mean it should be bland.
We'll season the flesh side with garlic, five-spice, white pepper, salt and a little sugar.
These ingredients give the pork a gentle Vietnamese-inspired savoury aroma.
However, there's one important rule.
Keep the seasoning away from the skin.
Sugar, garlic and wet marinades can scorch during the high-heat roasting stage.
If you get marinade on the skin, wipe it off immediately.
Step 4: Refrigerate uncovered overnight
Place the prepared pork belly skin-side up on a wire rack set over a tray.
Leave it uncovered in the fridge overnight, away from uncovered ready-to-eat food.
This allows the refrigerated air to dry the skin.
Ideally, give it around 12–24 hours.
The surface should look noticeably drier by the following day.
This is one of those small steps that makes a very big difference.
Don't leave the pork on the bench overnight.
Drying needs to happen safely in the fridge, below 5°C.
Step 5: Roast the pork gently
For a thick piece of pork belly, beginning at a moderate temperature gives the meat and fat time to cook before we blast the skin with higher heat.
This helps us avoid burnt crackling with undercooked or tough pork underneath.
We'll start at 160°C fan-forced.
A wire rack allows heat to circulate and keeps the meat elevated above the cooking juices.
Step 6: Finish with high heat
Once the pork is cooked and tender, we increase the oven temperature.
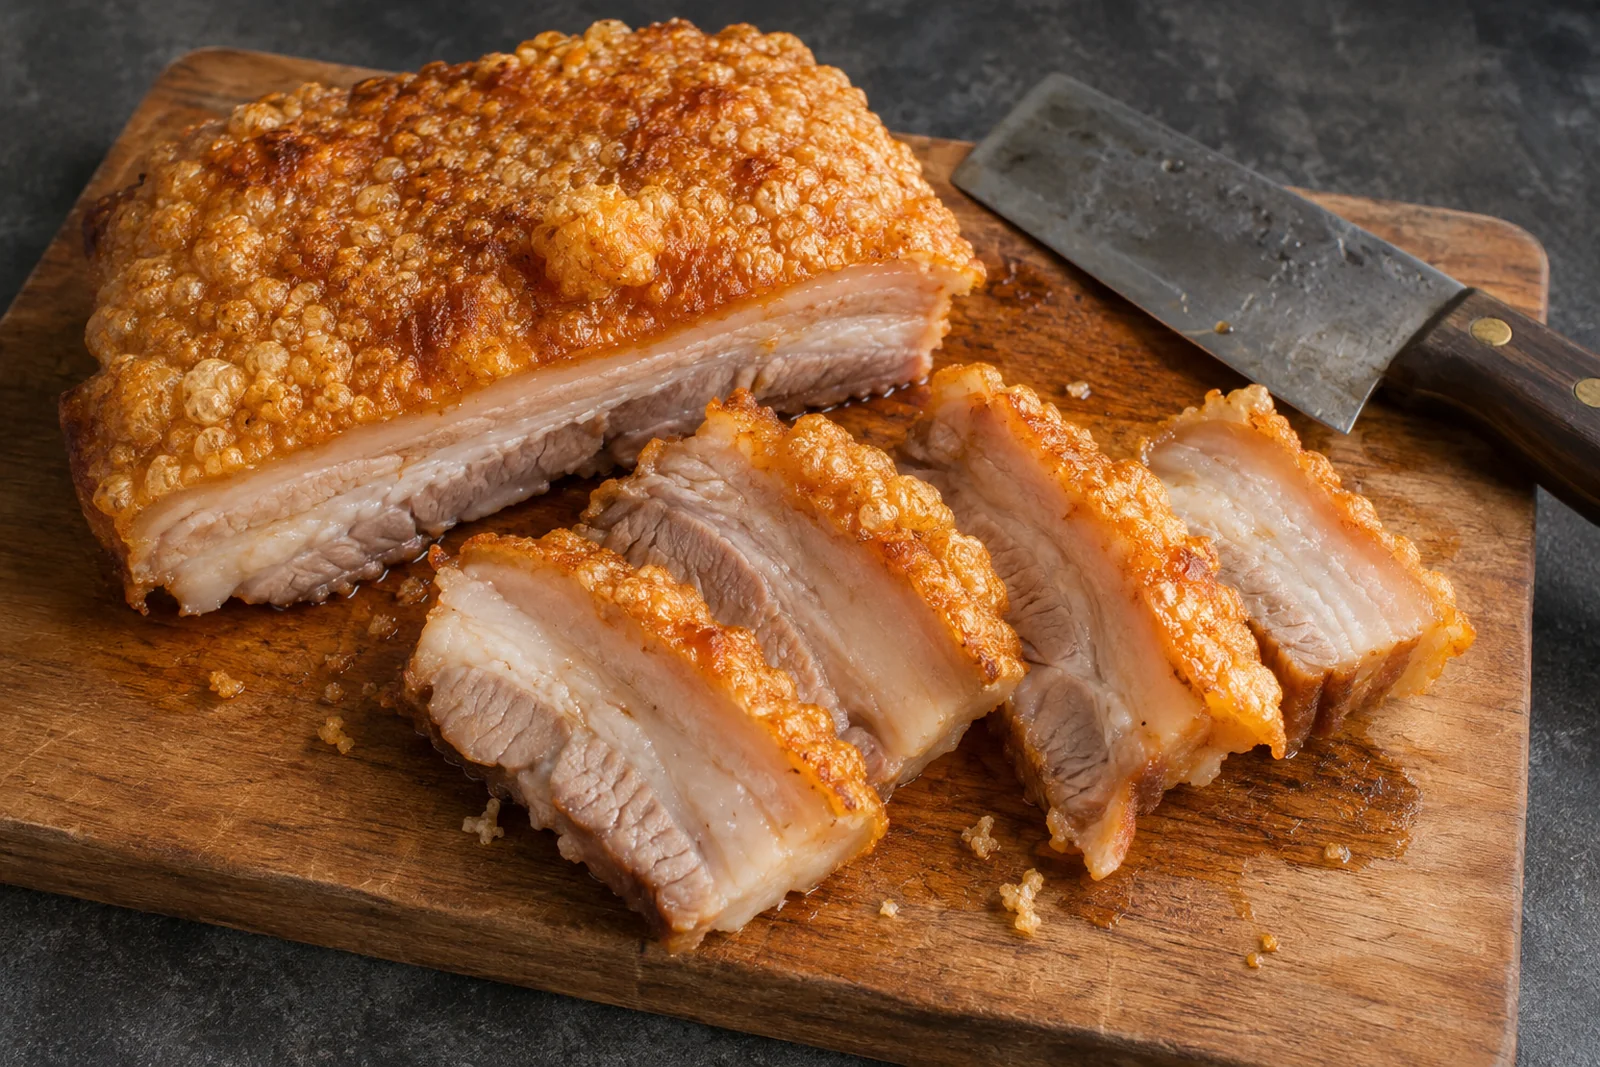
This is the stage where the skin should blister, puff and turn golden.
You'll often see little bubbles form across the surface.
Those bubbles are what give good crackling its distinctive light, brittle texture.
Watch carefully.
The difference between beautifully crisp and burnt can be surprisingly small.
Step 7: Rest and slice carefully
Let the pork rest before cutting.
This helps the meat settle and makes it easier to slice cleanly.
Use a sharp knife and work carefully around the crackling.
You want pieces small enough to fit comfortably into a sandwich, but thick enough to retain their texture.
Don't chop the pork into tiny crumbs.
The whole point is to enjoy the contrast between crunchy skin, tender meat and rendered fat.
Watch
The Beth Kitchen's short video shows the same core skin technique we use: a dry skin brushed with white vinegar and rubbed with salt, an overnight rest uncovered in the fridge, then a very hot finish until the skin puffs and turns golden. Her oven settings are different (she roasts at 200°C, then finishes under a hot grill), so watch it for the technique and use our recipe for times and temperatures.
Video: How to make EASY and Crispy Roasted Pork Belly - Thit Heo Quay by The Beth Kitchen. Watch on YouTube
Level 3 · The pork
Vietnamese Crispy Roast Pork Belly (Heo Quay)
- Makes
- Enough for 4 generous bánh mì, with possible leftovers
- Preparation
- 20–30 minutes
- Drying
- 12–24 hours, refrigerated
- Roasting
- Approximately 2–3 hours, depending on thickness and oven
- Resting
- 15–20 minutes
- Difficulty
- Advanced
This is a practical home-oven method informed by established Vietnamese crispy pork techniques. Oven behaviour and pork thickness vary, so use temperature and texture checks rather than treating the timings as guarantees. Spoon measures: 15 mL tablespoon, 5 mL teaspoon.
Ingredients
For the pork
- 1–1.2kg boneless, skin-on pork belly
- 1 teaspoon Chinese five-spice powder
- 1 teaspoon fine salt, for the meat
- ½ teaspoon white pepper
- 2 garlic cloves, finely grated
- 1 teaspoon white sugar
- 1 teaspoon light soy sauce
For the skin
- 1 teaspoon white vinegar
- 1 teaspoon fine salt
Method
- Prepare the pork. Place the pork belly skin-side up on a chopping board. Check that the skin is intact and relatively even. Pat it thoroughly dry with paper towel. Turn the pork over and make a few shallow cuts in the flesh side, without cutting through to the skin. These help the seasoning reach more of the meat.
- Season the flesh. Combine the five-spice powder, salt, white pepper, garlic, sugar and light soy sauce. Rub the mixture over the flesh and sides of the pork belly. Avoid getting any mixture on the skin. If some reaches the surface, wipe it off carefully.
- Prepare the skin. Turn the pork skin-side up. Pat it dry again. If you're using a suitable skin-pricking tool, prick the surface with many shallow holes, taking care not to penetrate deeply into the meat. Lightly brush the skin with the white vinegar. Pat away any obvious excess. Sprinkle the fine salt evenly over the surface.
- Dry overnight. Place the pork on a wire rack over a tray, with the skin facing up. Refrigerate uncovered for 12–24 hours. Keep the tray positioned safely so raw pork juices cannot drip onto other food. By the next day, the skin should look and feel noticeably dry.
- Preheat the oven. Preheat to 160°C fan-forced. Place the pork on its rack above a roasting tray. If the piece is uneven, use a small support of folded foil beneath the meat to help keep the skin reasonably level, without covering it. An even surface helps the skin brown consistently.
- Begin roasting. Roast for approximately 90–120 minutes, checking as you approach the end of that range. Actual cooking time will depend on the pork's thickness and your oven. Check the thickest part of the meat with a thermometer, avoiding fat pockets. The Australian guidance for an ordinary whole cut of pork gives 70°C as a cooking temperature, but pork belly often benefits from cooking well beyond that point for tenderness. For this recipe, we're looking for the meat to become tender when pierced, with much of the fat softened and rendered. A centre temperature around 85–95°C may be reached during this process. If the pork isn't tender yet, continue roasting and check again.
- Increase the heat. Once the meat is tender, increase the oven to 230°C fan-forced, or the highest appropriate roasting temperature recommended for your oven. Watch the pork closely as the surface begins to blister. The crackling stage may take roughly 15–30 minutes, sometimes longer or shorter depending on the oven and skin preparation. Don't leave it unattended. If one area browns much faster than another, rotate the tray. If small sections begin burning before the rest has crisped, shield those sections carefully with a little foil.
- Check the crackling. The skin should have turned golden and developed lots of small blisters. Tap it gently with a utensil. Good crackling should feel firm and brittle rather than flexible and rubbery. Don't keep roasting simply because a few stubborn patches haven't puffed if the rest is already becoming too dark.
- Rest. Remove the pork from the oven. Rest on a rack for 15–20 minutes. Avoid tightly covering the crackling with foil, as trapped steam can soften it.
- Slice. Use a sharp knife to cut the pork into pieces approximately 1–1.5cm thick. If the crackling is difficult to cut cleanly, turn the pork skin-side down on a clean board and slice carefully through the meat first. For the bánh mì, use pieces that give each bite a good balance of skin, fat and meat.
Equipment
- Wire roasting rack
- Roasting tray
- Paper towel
- Sharp knife
- Meat thermometer
- Oven with a reliable high-heat setting
What does success look like?
The crackling should be golden, blistered and crisp.
The fat underneath should feel soft and rendered, not rubbery.
The meat should be juicy and tender enough to bite through comfortably.
Most importantly, you should be able to taste the pork itself.
The five-spice should add gentle background warmth, not overwhelm the filling.
Crispy Pork Belly Troubleshooting
Why isn't my pork skin crispy?
Usually, the skin was too wet, the oven wasn't hot enough during the final stage, or the surface didn't have enough time to dry before roasting.
Make sure the pork has been refrigerated uncovered overnight.
Keep marinades away from the skin.
And give the oven enough time to reach its proper finishing temperature.
Why is the skin crispy in some places but chewy in others?
Uneven thickness and inconsistent oven heat are common causes.
Some parts of the skin may also hold more moisture.
Try to choose a relatively even piece of pork and keep the skin level during roasting.
Rotate the tray if your oven has obvious hot spots.
Why did the crackling burn?
The skin was probably exposed to very high heat for too long, or sugary marinade reached the surface.
Check frequently during the final roasting stage.
Don't treat a recipe's suggested timing as a guarantee.
Your oven may be considerably more powerful than someone else's.
Why is the pork meat tough?
Pork belly contains connective tissue and layers of fat that benefit from time at a moderate roasting temperature.
If you move straight to high heat, the skin may become crisp before the meat has had enough time to tenderise.
Cook the belly until tender before concentrating on the crackling.
Why is the pork too fatty?
Pork belly is naturally a rich cut.
Choosing a piece with a reasonable proportion of meat helps, as does allowing the fat to render properly.
For bánh mì, you also need balance.
A few good slices of rich pork belly are better than completely stuffing the roll.
The pickles and fresh vegetables are particularly important here.
Can I make the pork in advance?
Yes.
You can prepare and season the pork the day before roasting — in fact, that's what we're recommending.
Once cooked, it's best enjoyed while the crackling is still crisp.
If storing leftovers, cool and refrigerate promptly, then reheat thoroughly to 75°C in the centre. The crackling may soften in storage, although a hot oven can help restore some crispness.
Don't repeatedly reheat the same leftovers.
Building the Ultimate Crispy Pork Bánh Mì
Now we've got our pork, it's time to put everything together.
We're going to use the same foundations as Levels 1 and 2, with a few carefully chosen upgrades.
The pork is now the star.
The pâté adds richness.
The pickles cut through the fat.
The cucumber and coriander keep things fresh.
And a few drops of savoury seasoning give the finished sandwich its final flourish.
Watch
Eater's The Experts visits Bánh Anh Em in New York, a shop that makes its own baguettes, pâté and roast pork. The player starts at the roasted pork bánh mì; there's also a chapter on the bread. Watch how a busy shop handles the roll, then compare its proportions with ours: how much pâté goes on, how the pork is layered, and how the pickles and herbs are spread through the sandwich.
Video: NYC's Hottest Bánh Mì Shop Sells Thousands a Week — The Experts by Eater. Watch on YouTube
Level 3 · Advanced
Ultimate Crispy Pork Bánh Mì
- Serves
- 4
- Preparation
- 15 minutes once components are ready
- Assembly
- 5 minutes
- Additional time
- See pork belly and pickle recipes above
- Difficulty
- Advanced
Spoon measures: 15 mL tablespoon, 5 mL teaspoon.
Ingredients
- 4 fresh Vietnamese-style baguette rolls, approximately 20–25cm long
- 400–500g prepared Vietnamese crispy roast pork belly, sliced
- 4 tablespoons whole-egg mayonnaise (60mL total)
- 80g smooth chicken liver pâté
- 200g prepared carrot and daikon pickles, drained
- 1 Lebanese cucumber, cut into long, thin batons
- 1 large handful fresh coriander sprigs
- 1 long red chilli, thinly sliced (optional)
- 1 teaspoon Maggi Seasoning, approximately, to taste
Make the crispy pork belly and the pickles first.
Method
- Prepare the bread. Warm the rolls at 180°C fan-forced for 3–5 minutes, just until crisp. Cut them along one side, leaving a hinge.
- Spread the mayonnaise. Add approximately 1 tablespoon of mayonnaise to one interior surface of each roll. Spread it evenly from end to end.
- Add the pâté. Spread approximately 20g of pâté on the opposite interior surface. Keep the layer relatively thin. The pâté should support the pork, not dominate it.
- Add the crispy pork belly. Divide the warm, sliced pork belly between the four rolls. Arrange the slices so the crackling stays visible and isn't buried beneath too many wet ingredients. Make sure each sandwich contains a good balance of meat, fat and skin.
- Add the pickles. Place approximately 50g of well-drained carrot and daikon pickles over the meat in each roll. Don't add excess pickling liquid. Too much moisture will soften the bread and crackling.
- Add the fresh ingredients. Add cucumber batons, coriander sprigs and a few slices of chilli if you like some heat. Keep the vegetables evenly distributed.
- Add the final seasoning. Add a few small drops of Maggi Seasoning directly onto the pork in each sandwich. Start with approximately ¼ teaspoon per roll or less. You can always add more, but too much will make the filling unnecessarily salty.
- Serve immediately. Gently close the rolls without crushing the crackling. Eat while the bread and pork are still crisp. Don't assemble the sandwiches far in advance.
Note
- Pregnant? Refrigerated pâté is a listeria risk. The NSW Food Authority advises avoiding it during pregnancy (canned or shelf-stable pâté is fine), so leave it out or choose a shelf-stable one.
What should Level 3 taste like?
This is where everything comes together.
The first thing you notice is the bread and pork crackling.
Then comes the rich pork belly, creamy pâté and mayonnaise.
The pickles cut through the fat, while the cucumber and coriander keep the whole thing feeling fresh.
The Maggi should be subtle.
You shouldn't taste a mouthful of sauce.
You should simply notice that the savoury flavours feel a little more complete.
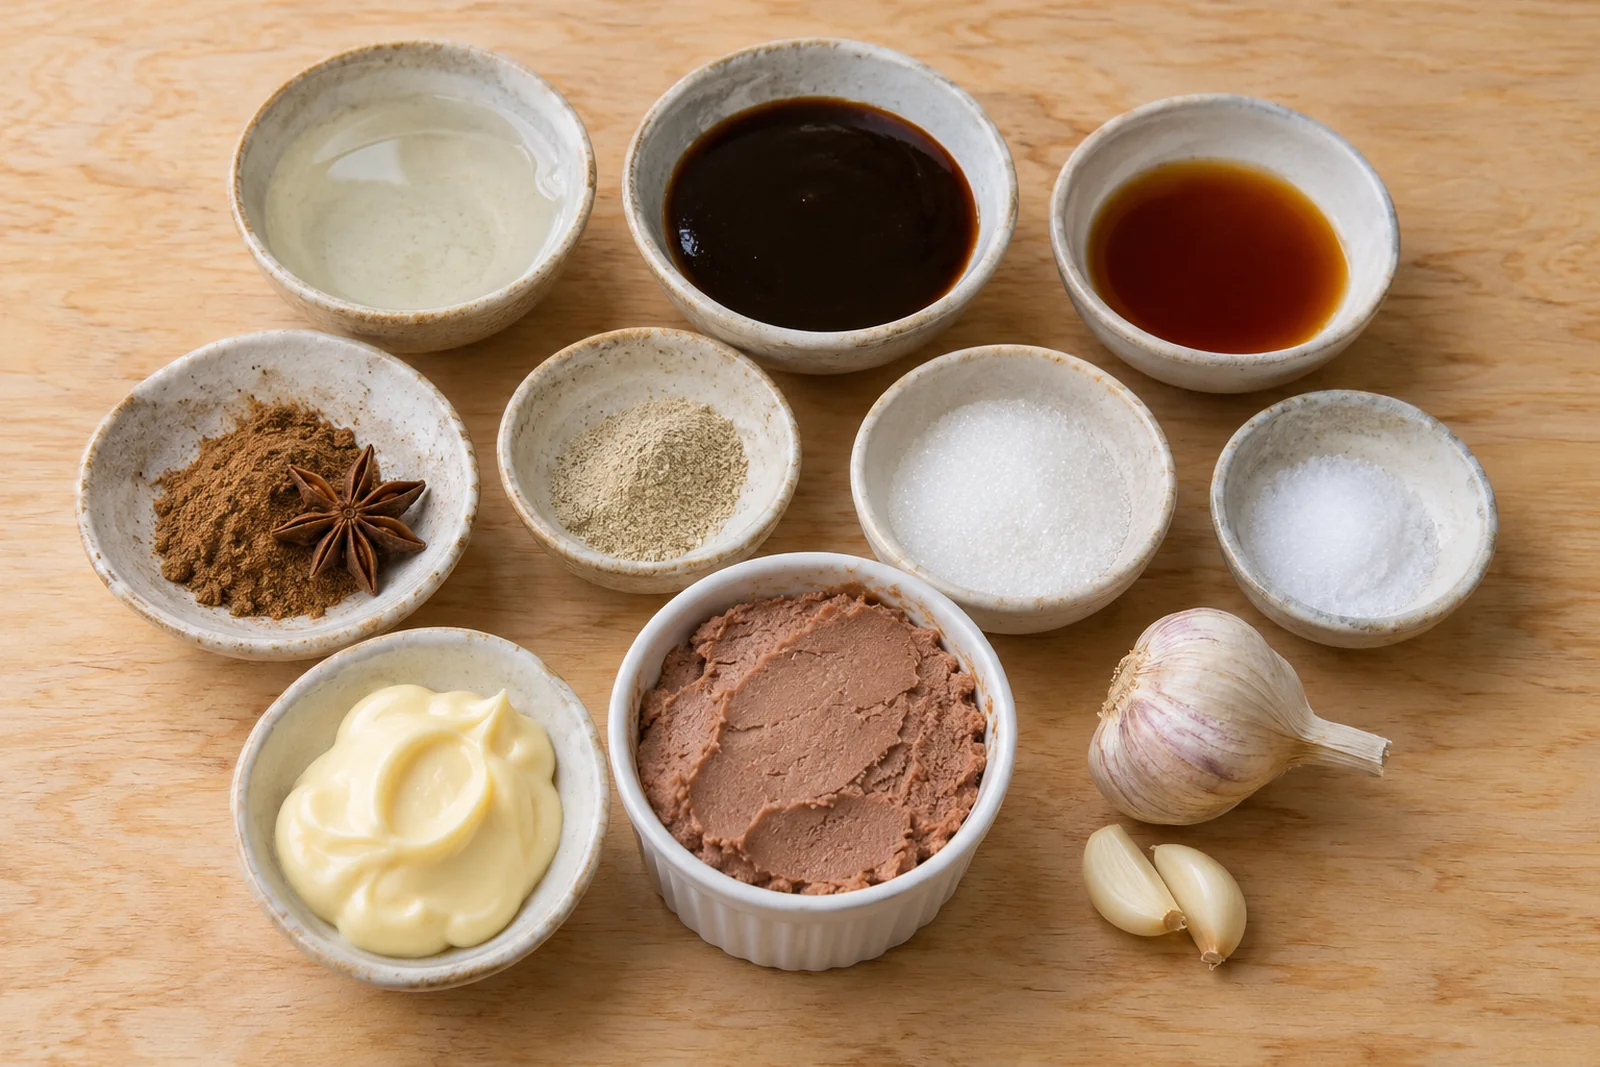
The Bánh Mì Pantry: What Each Ingredient Actually Does
One of the best things about Vietnamese cooking is how ordinary pantry ingredients are used to create balance.
You don't need dozens of sauces.
But a few carefully chosen products can make a big difference.
Rice vinegar
Rice vinegar is one of the key ingredients in our carrot and daikon pickles.
It gives them a relatively gentle acidity that balances the sweetness of the sugar and the natural flavour of the vegetables.
Other mild vinegars can work, but rice vinegar is an excellent starting point.
Where we use it: Levels 2 and 3.
Mr Pantry ingredient guide: Rice vinegar.
Maggi Seasoning
Maggi Seasoning is a concentrated savoury sauce that's used in various cuisines, including in some Vietnamese bánh mì shops.
It's salty, deeply savoury and quite powerful.
You only need a few drops.
Different countries have different Maggi formulations, so the flavour can vary depending on which version you buy.
For our ultimate bánh mì, it's a finishing ingredient, not a marinade.
Where we use it: Level 3.
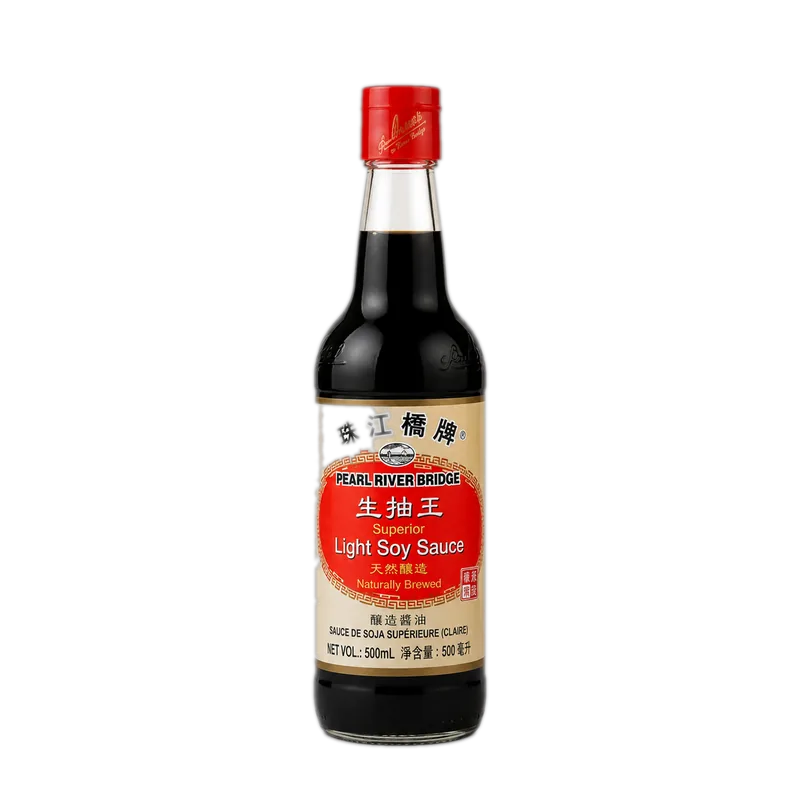
Can you substitute light soy sauce? Yes, in a pinch. It won't taste identical, but a few drops of light soy sauce will add a similar salty, savoury note.
Light soy sauce
Light soy sauce is useful in the pork belly seasoning.
It adds savouriness without introducing the heavy colour associated with some dark soy sauces.
A small amount is enough.
The pork also gets flavour from garlic, five-spice and white pepper.
Where we use it: Level 3 pork seasoning.
Chinese five-spice powder
Five-spice powder often contains a combination of star anise, cinnamon or cassia, fennel, cloves and Sichuan pepper, although blends vary.
It has a distinctive warm, aromatic flavour.
For our pork belly, we use it sparingly.
Too much will overpower the meat.
Where we use it: Level 3 pork belly.
White pepper
White pepper has an earthy, slightly funky warmth that works beautifully with pork.
It's a useful ingredient in many Chinese and Vietnamese-inspired savoury dishes.
A little goes a long way.
Where we use it: Level 3 pork belly.
Mayonnaise
Mayonnaise might seem like a humble ingredient, but it matters.
It adds richness and moisture, helping balance the crisp bread and savoury pork.
Many Vietnamese bakeries use their own egg-based spreads, which can differ from standard supermarket mayonnaise.
For making bánh mì at home, a good-quality whole-egg mayonnaise works perfectly well.
Where we use it: All three levels.
Pâté
Pâté isn't really a shelf-stable pantry staple in this context, but it's one of the most important flavour components in many Vietnamese bánh mì styles.
Chicken liver pâté is widely available and gives the sandwich a deep, rich savouriness.
Keep it refrigerated and follow the storage directions on the packaging.
Where we use it: Levels 2 and 3.
Six Common Bánh Mì Mistakes
1. Using the wrong bread
A dense, chewy baguette can make even an excellent filling disappointing.
Look for Vietnamese-style rolls with a light crumb and thin crust.
Warm them briefly before assembling.
2. Overstuffing the sandwich
More isn't always better.
If you've packed in so much meat and vegetables that the bread can't close properly, the sandwich becomes difficult to eat.
A little restraint makes a big difference.
3. Making the fillings too wet
Excess liquid from pickles, meat juices or sauce can quickly soften the bread.
Drain the pickles and avoid pouring liquid seasoning into the roll.
4. Using too much pâté
Pâté is rich and strongly flavoured.
A thin, even layer is usually enough.
You want to taste the pork, vegetables and bread too.
5. Forgetting the acidity
A rich pork bánh mì without pickles can feel heavy.
That's why the đồ chua becomes especially valuable in Levels 2 and 3.
Don't underestimate the importance of something sharp and crunchy.
6. Assembling too early
Bánh mì is at its best when freshly assembled.
If you're preparing sandwiches for a group, keep the ingredients separate until just before serving.
Warm the bread, slice the meat and assemble at the last minute.
Other Types of Bánh Mì Worth Trying
Once you've mastered the core sandwich, there are plenty of other variations to explore.
They're not necessarily easier or more difficult than the three levels we've covered. They're simply different styles with their own ingredients and traditions.
Bánh Mì Thịt Nướng — Grilled Pork
A popular variation using grilled pork, often marinated with ingredients such as lemongrass, garlic, fish sauce and sugar.
The meat has a different character from crispy pork belly, with sweet-savoury caramelisation and aromatic notes.
Bánh Mì Trứng — Fried Egg
A simple and satisfying version made with fried eggs.
It's particularly good for breakfast and makes a brilliant quick meal.
Bánh Mì Đặc Biệt — The Special
A mixed-meat bánh mì commonly featuring Vietnamese cold cuts, pork roll or sausage, pâté and fresh vegetables.
It's a different style from our crispy pork belly version, even though some of the spreads and vegetables are similar.
Bánh Mì Gà — Chicken
Chicken bánh mì can use grilled, roasted or shredded chicken.
It's a useful variation when you have cooked chicken to use up.
Bánh Mì Chay — Vegetarian
Vegetarian bánh mì can feature tofu, mushrooms, vegetables and plant-based spreads.
The same principles apply: good bread, balanced fillings, freshness and enough moisture to prevent the sandwich from tasting dry.
Frequently Asked Questions About Bánh Mì
What is bánh mì?
Bánh mì is a Vietnamese term for bread that is also widely used to describe Vietnamese baguette sandwiches. These sandwiches typically combine a light, crisp roll with savoury fillings, spreads, vegetables and fresh herbs. The exact ingredients vary considerably.
What bread is used for bánh mì?
Vietnamese-style baguette rolls are the best choice. They have a thin, crisp crust and a light, airy interior. They're generally less dense and chewy than traditional French baguettes.
Is bánh mì French or Vietnamese?
Bánh mì is Vietnamese, with historical influences from French colonial-era bread and pâté. Vietnamese cooks and bakers developed their own distinctive bread, fillings, seasonings and sandwich traditions.
What meat is best for bánh mì?
There's no single best meat. Roast pork, grilled pork, crispy pork belly, Vietnamese cold cuts, chicken and other proteins all work well in different styles. For a particularly rich homemade sandwich, crispy pork belly is an excellent choice.
Does bánh mì need pâté?
No. Many bánh mì sandwiches contain pâté, but not all. It adds savoury richness, particularly when paired with pork and pickled vegetables. You can make a perfectly good bánh mì without it.
What pâté is used in bánh mì?
Vietnamese-style liver pâté is common. Smooth chicken liver pâté is a practical supermarket substitute for home cooks. The ideal pâté is savoury, smooth and easy to spread.
What vegetables go in bánh mì?
Common additions include cucumber, coriander, pickled carrot and daikon, and fresh chilli. Other vegetables and herbs may appear depending on the regional style and filling.
What are the pickles in bánh mì?
They're commonly called đồ chua, made from thinly cut carrot and daikon radish preserved in a sweet-sour vinegar mixture. They add crunch and acidity, helping balance rich meat and spreads.
What is the sauce in bánh mì?
There isn't one universal bánh mì sauce. Depending on the sandwich, you might find mayonnaise or an egg-based spread, pâté, soy-based seasoning sauce, chilli sauce or sauces associated with the meat filling.
Do you put Maggi Seasoning in bánh mì?
Some Vietnamese bakeries use Maggi Seasoning or similar savoury sauces, while others don't. A few drops can add depth, but it's not essential to every bánh mì.
Is crispy pork bánh mì the same as bánh mì đặc biệt?
Not necessarily. Crispy pork bánh mì, or bánh mì heo quay, focuses on roast pork with crispy skin. Bánh mì đặc biệt commonly refers to a mixed-meat special featuring Vietnamese cold cuts and other fillings.
How do you get crispy pork belly skin?
The most important steps are to keep the skin dry, avoid getting wet marinade on it, allow it to dry uncovered in the fridge and finish roasting with sufficiently high heat. Pork thickness, oven temperature and evenness also affect the result.
Why is my pork belly crackling chewy?
The skin may have retained too much moisture or not received enough heat to blister properly. Uneven oven heat or inconsistent skin thickness can also cause patchy results.
Can you make bánh mì in advance?
You can prepare most of the components ahead of time, including the pickles and pork. However, the finished sandwich is best assembled immediately before eating to keep the bread and fillings at their best.
Can you make bánh mì without a Vietnamese bakery nearby?
Yes. Use the lightest, crispiest white roll you can find. It won't be exactly the same as a Vietnamese baguette, but with good fillings and careful assembly, it can still be delicious.
The Final Word: It's All About the Layers
There's a reason people become a little obsessed with finding a really good bánh mì.
It's not simply the meat.
It's the contrast between the crisp bread and soft filling. The richness of the pâté against the sharp pickles. The fresh coriander and cucumber cutting through the savoury pork.
And, if you're making our ultimate version, that glorious crackle of properly roasted pork belly.
But you don't have to start there.
Level 1 teaches you how important good bread, an even spread and fresh ingredients can be.
Level 2 introduces the rich and sour flavours that give a bakery-style bánh mì its distinctive balance.
Level 3 is about giving every component the attention it deserves, especially the pork.
Start with a simple sandwich.
Understand what each ingredient does.
Then keep making it better.
That's the real secret to an extraordinary bánh mì.
Mr Pantry — Good food starts in the pantry.